Balloon Dog Process with Photos
Found Item: Balloon Dog —— One of a Kind Painted Balloon Dog
I’ve always got my eyes open as I go about life, for shapes, and objects that are both the right material “upcycling” and something that inspires my colour focused brain.
Recently I came across this Balloon Dog. It was listed with a Balloon Unicorn as well- so consider the Unicorn an upcoming project. Here is what the Dog looked like when I found her.
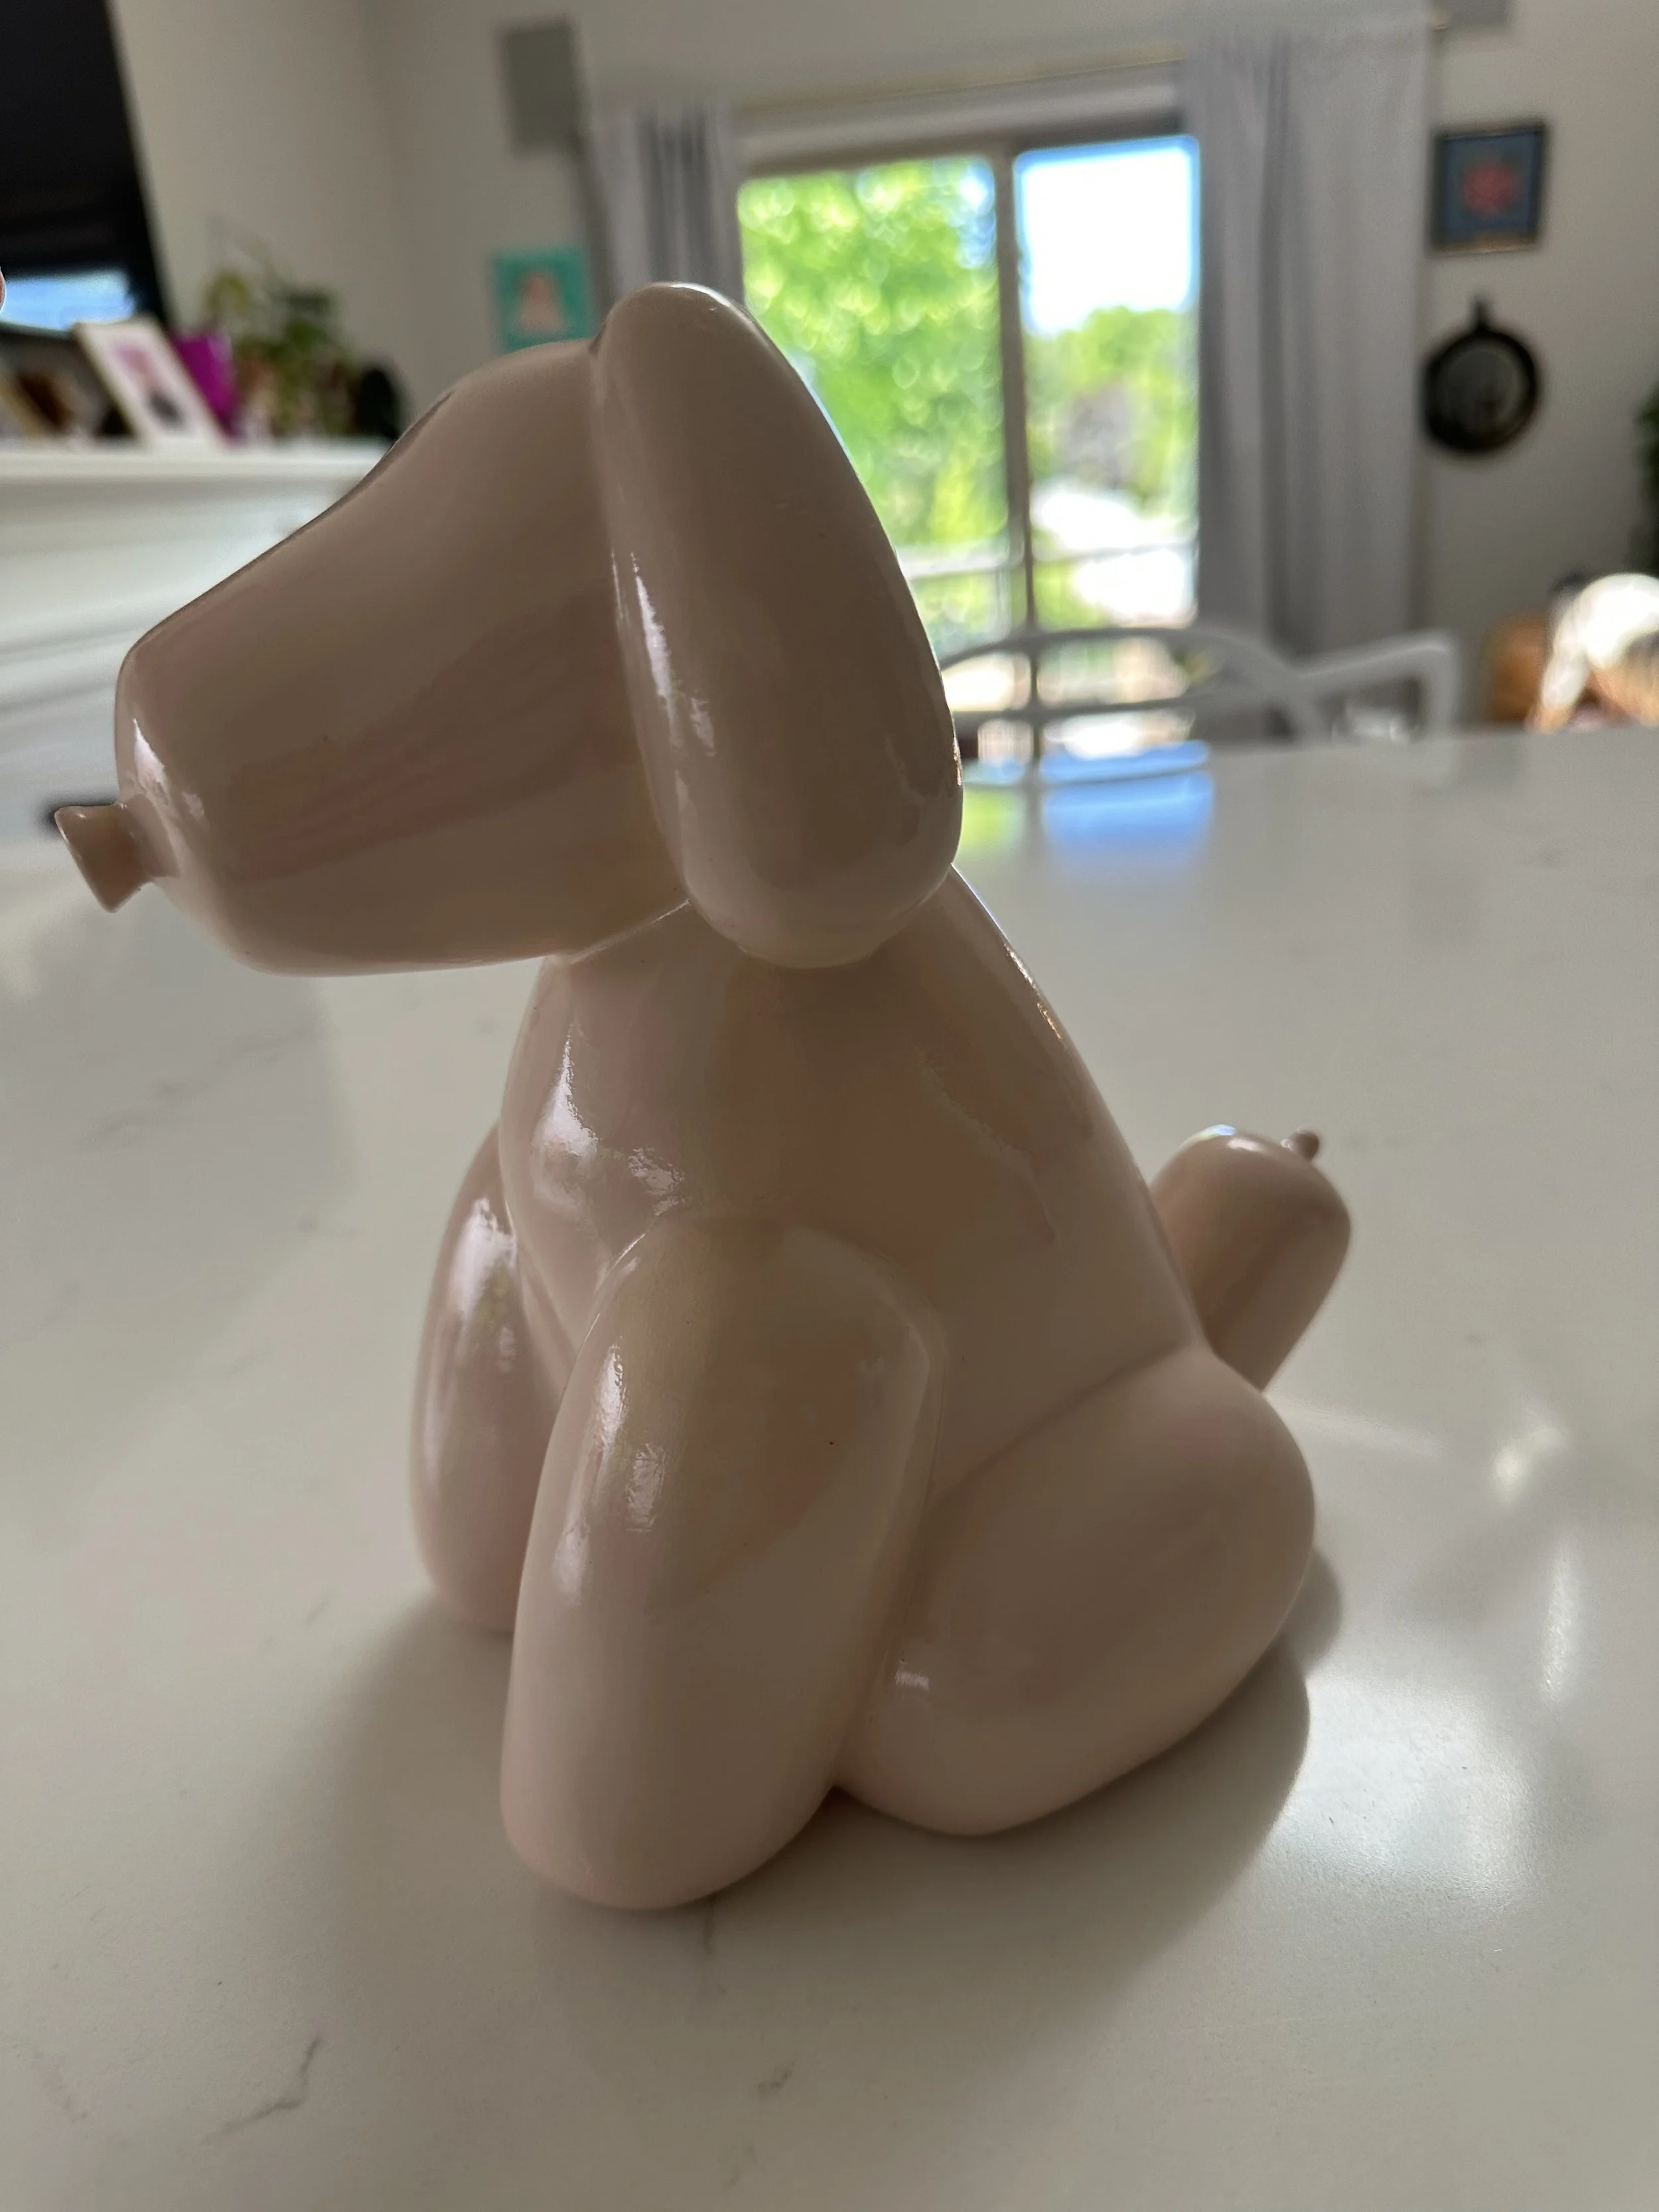
Obviously I liked the shapes, and nothing truly wrong with their colours- other than being bland.
I know they can be much more interesting.
I put a poll on Instagram and the Dog was chosen to be created first..
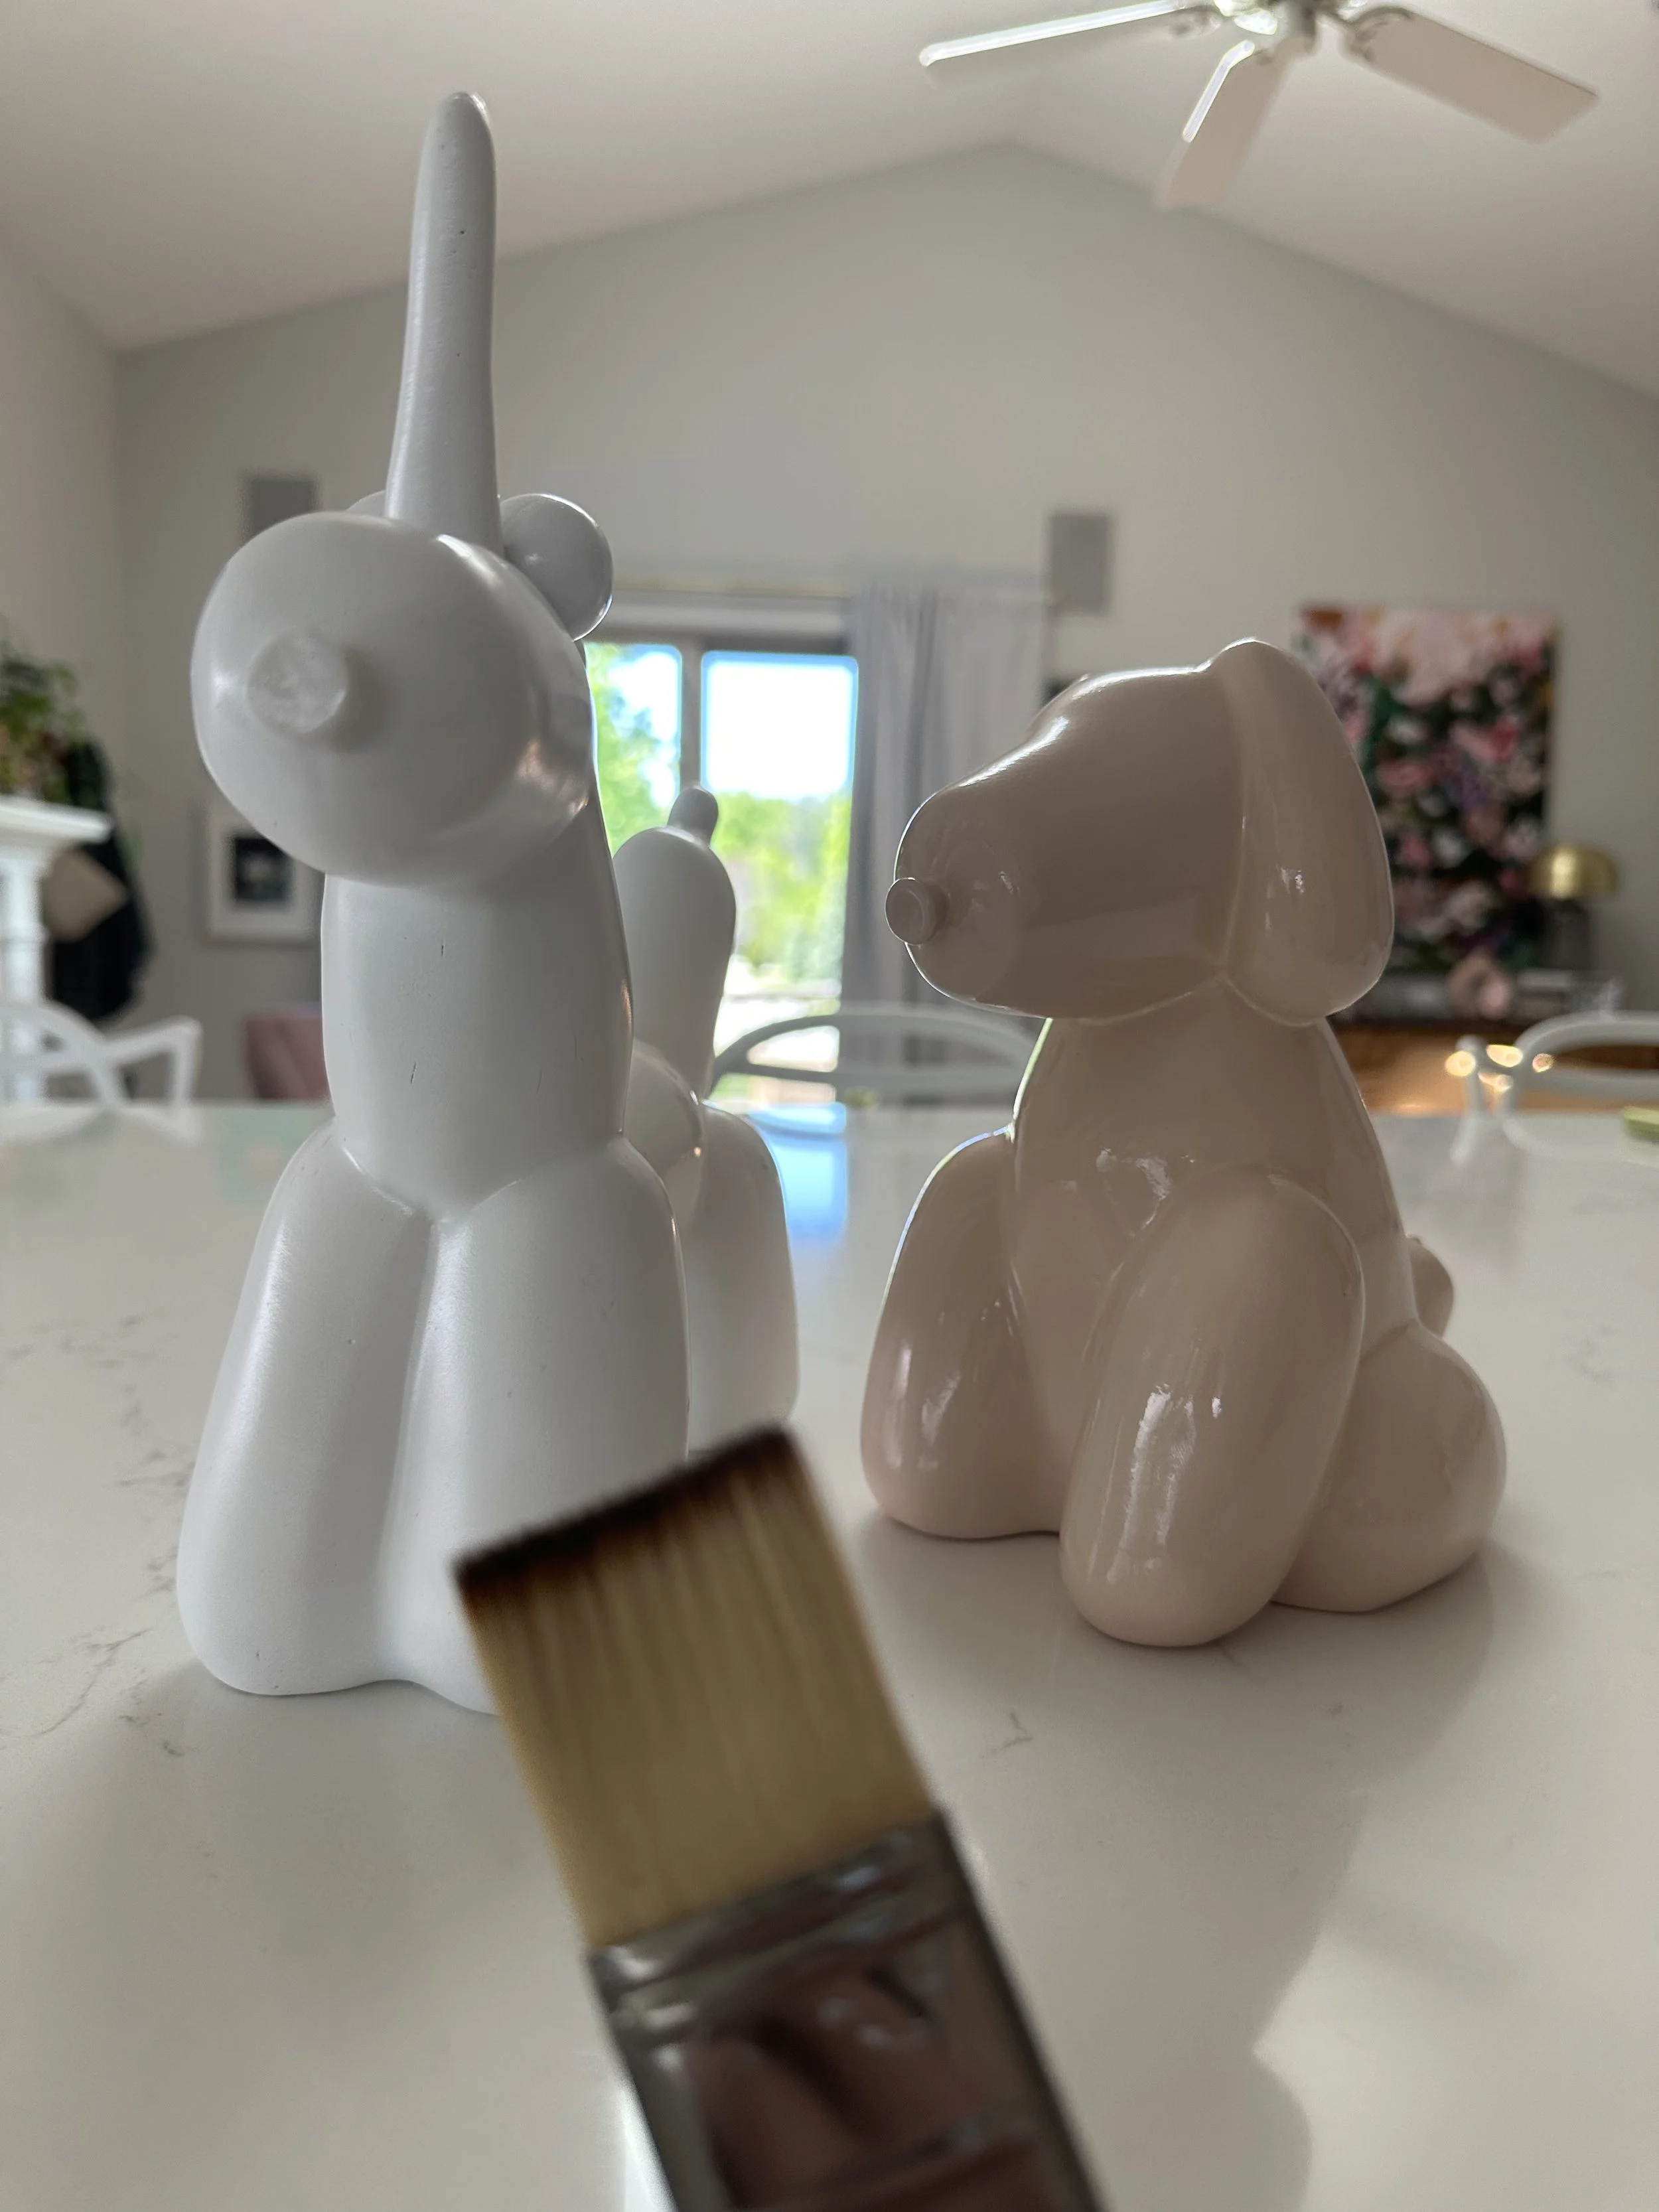
Unicorn + Dog Unchanged
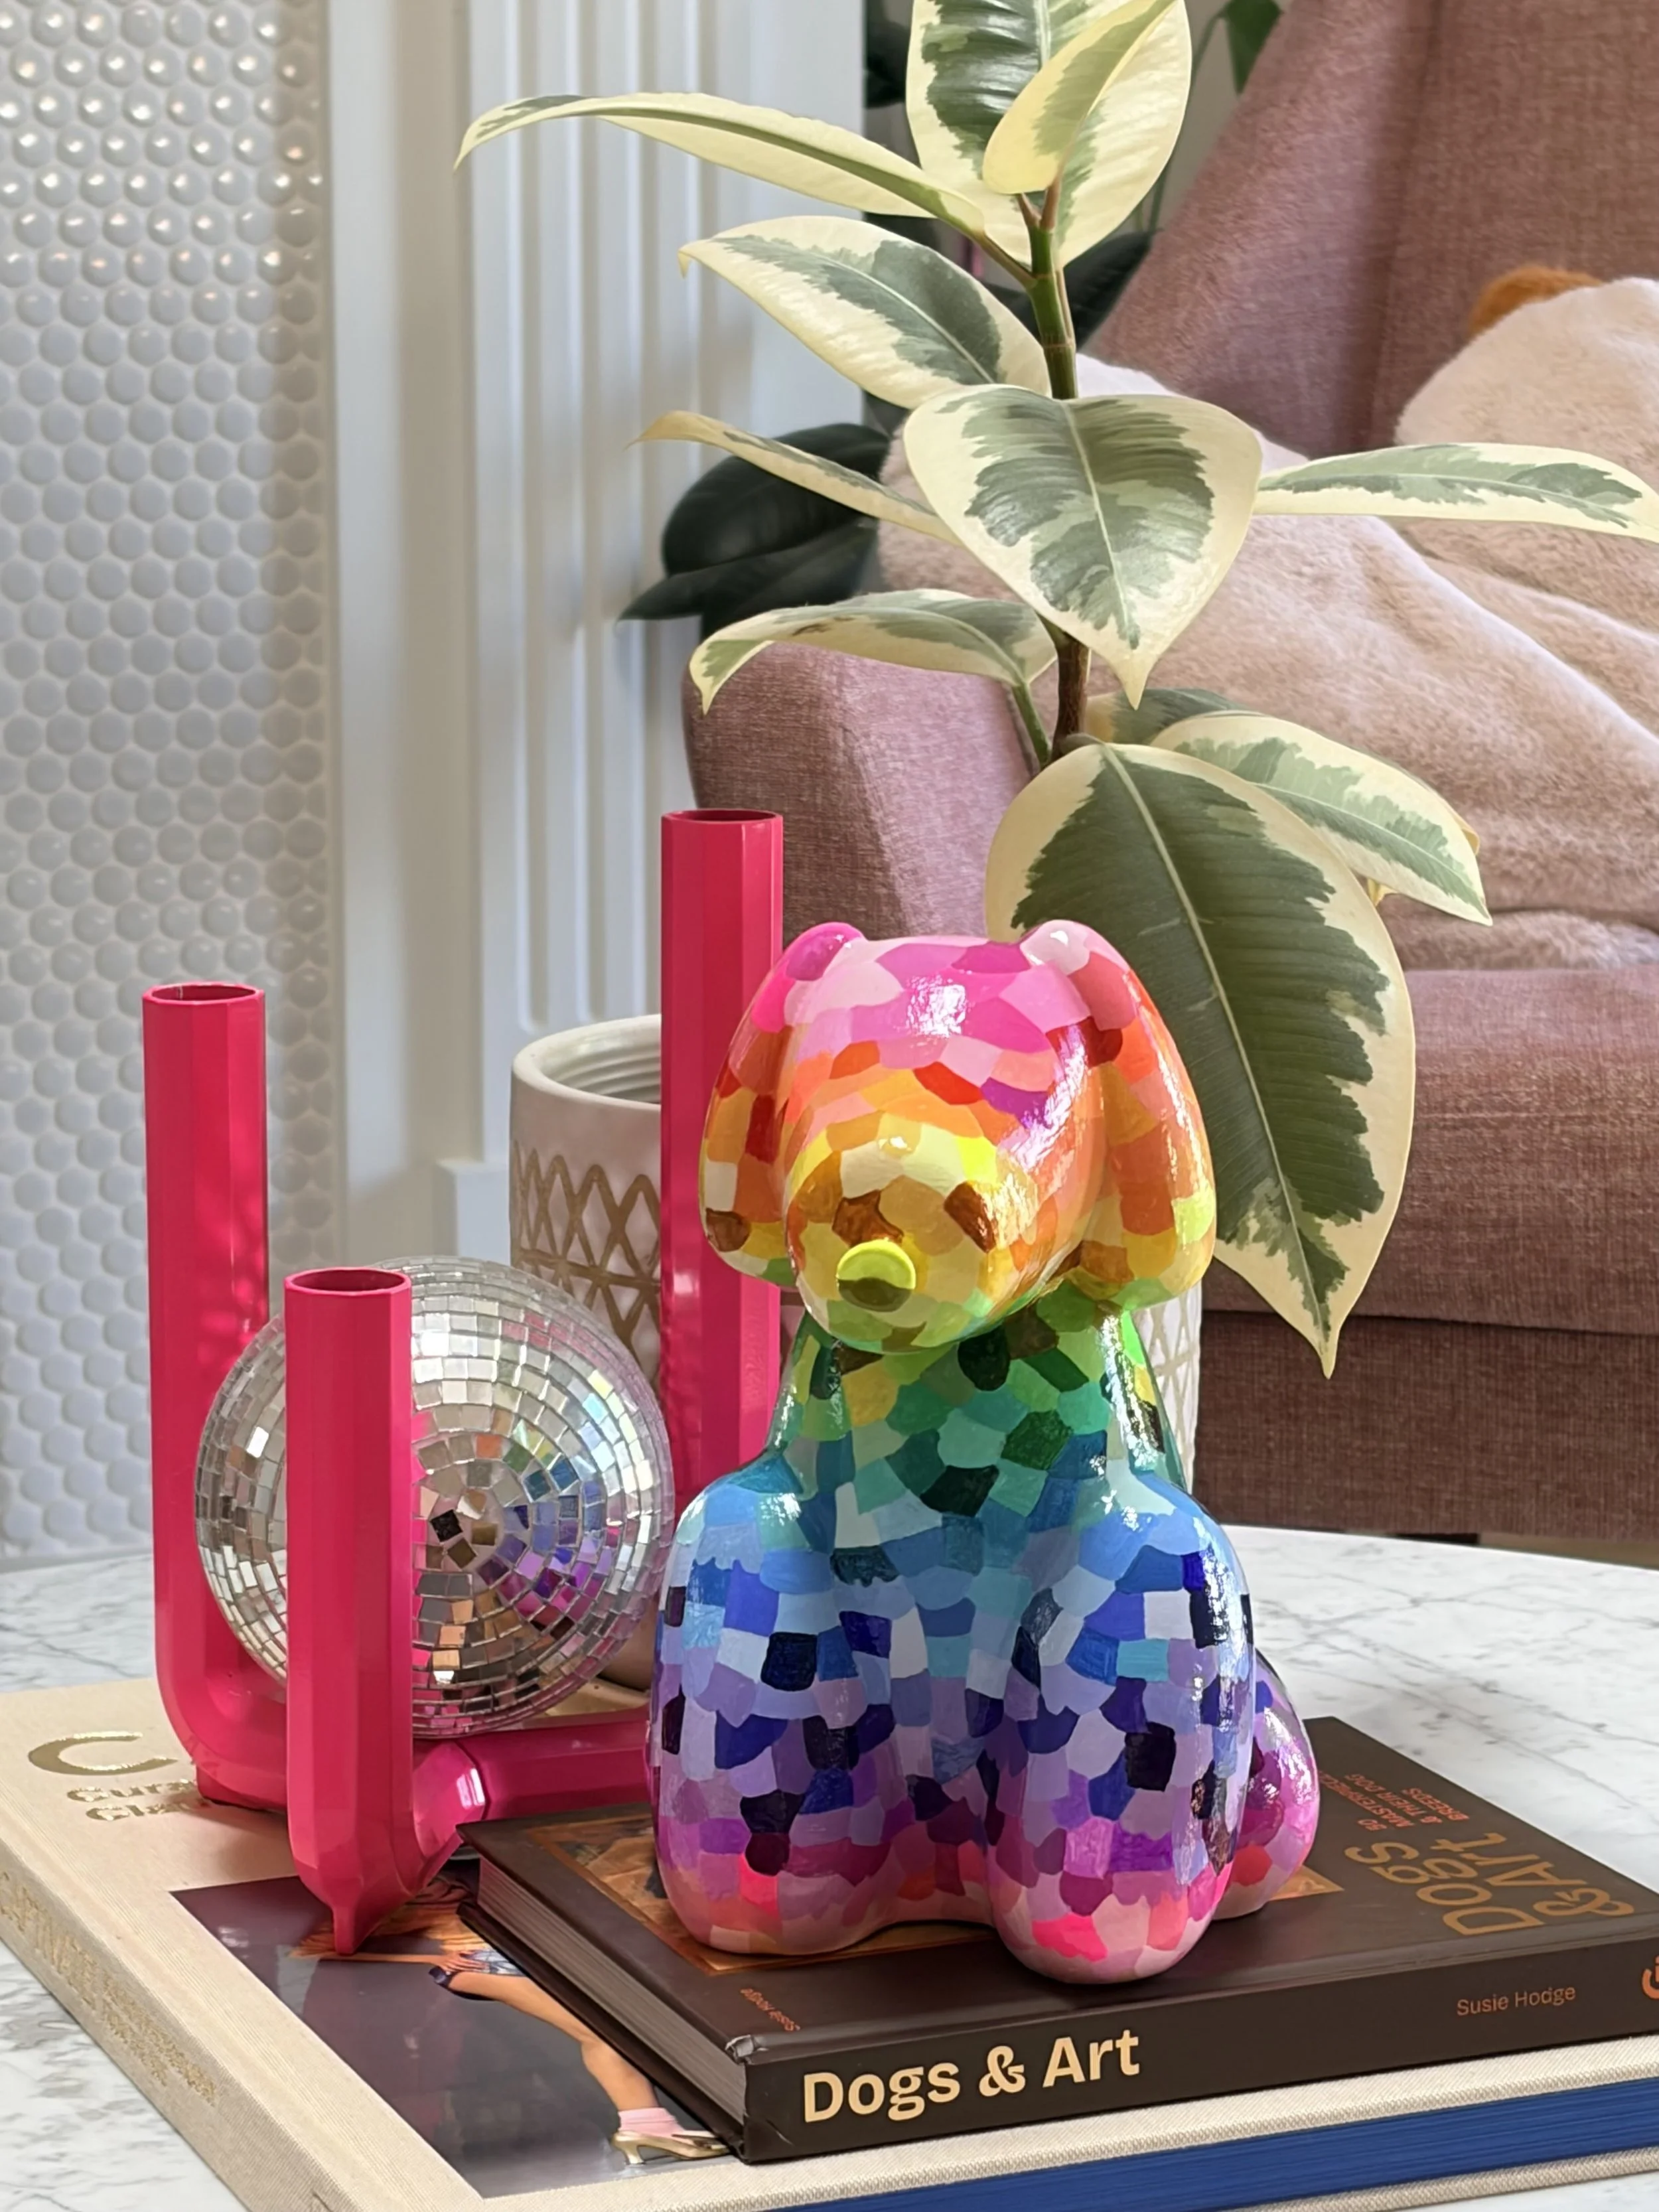
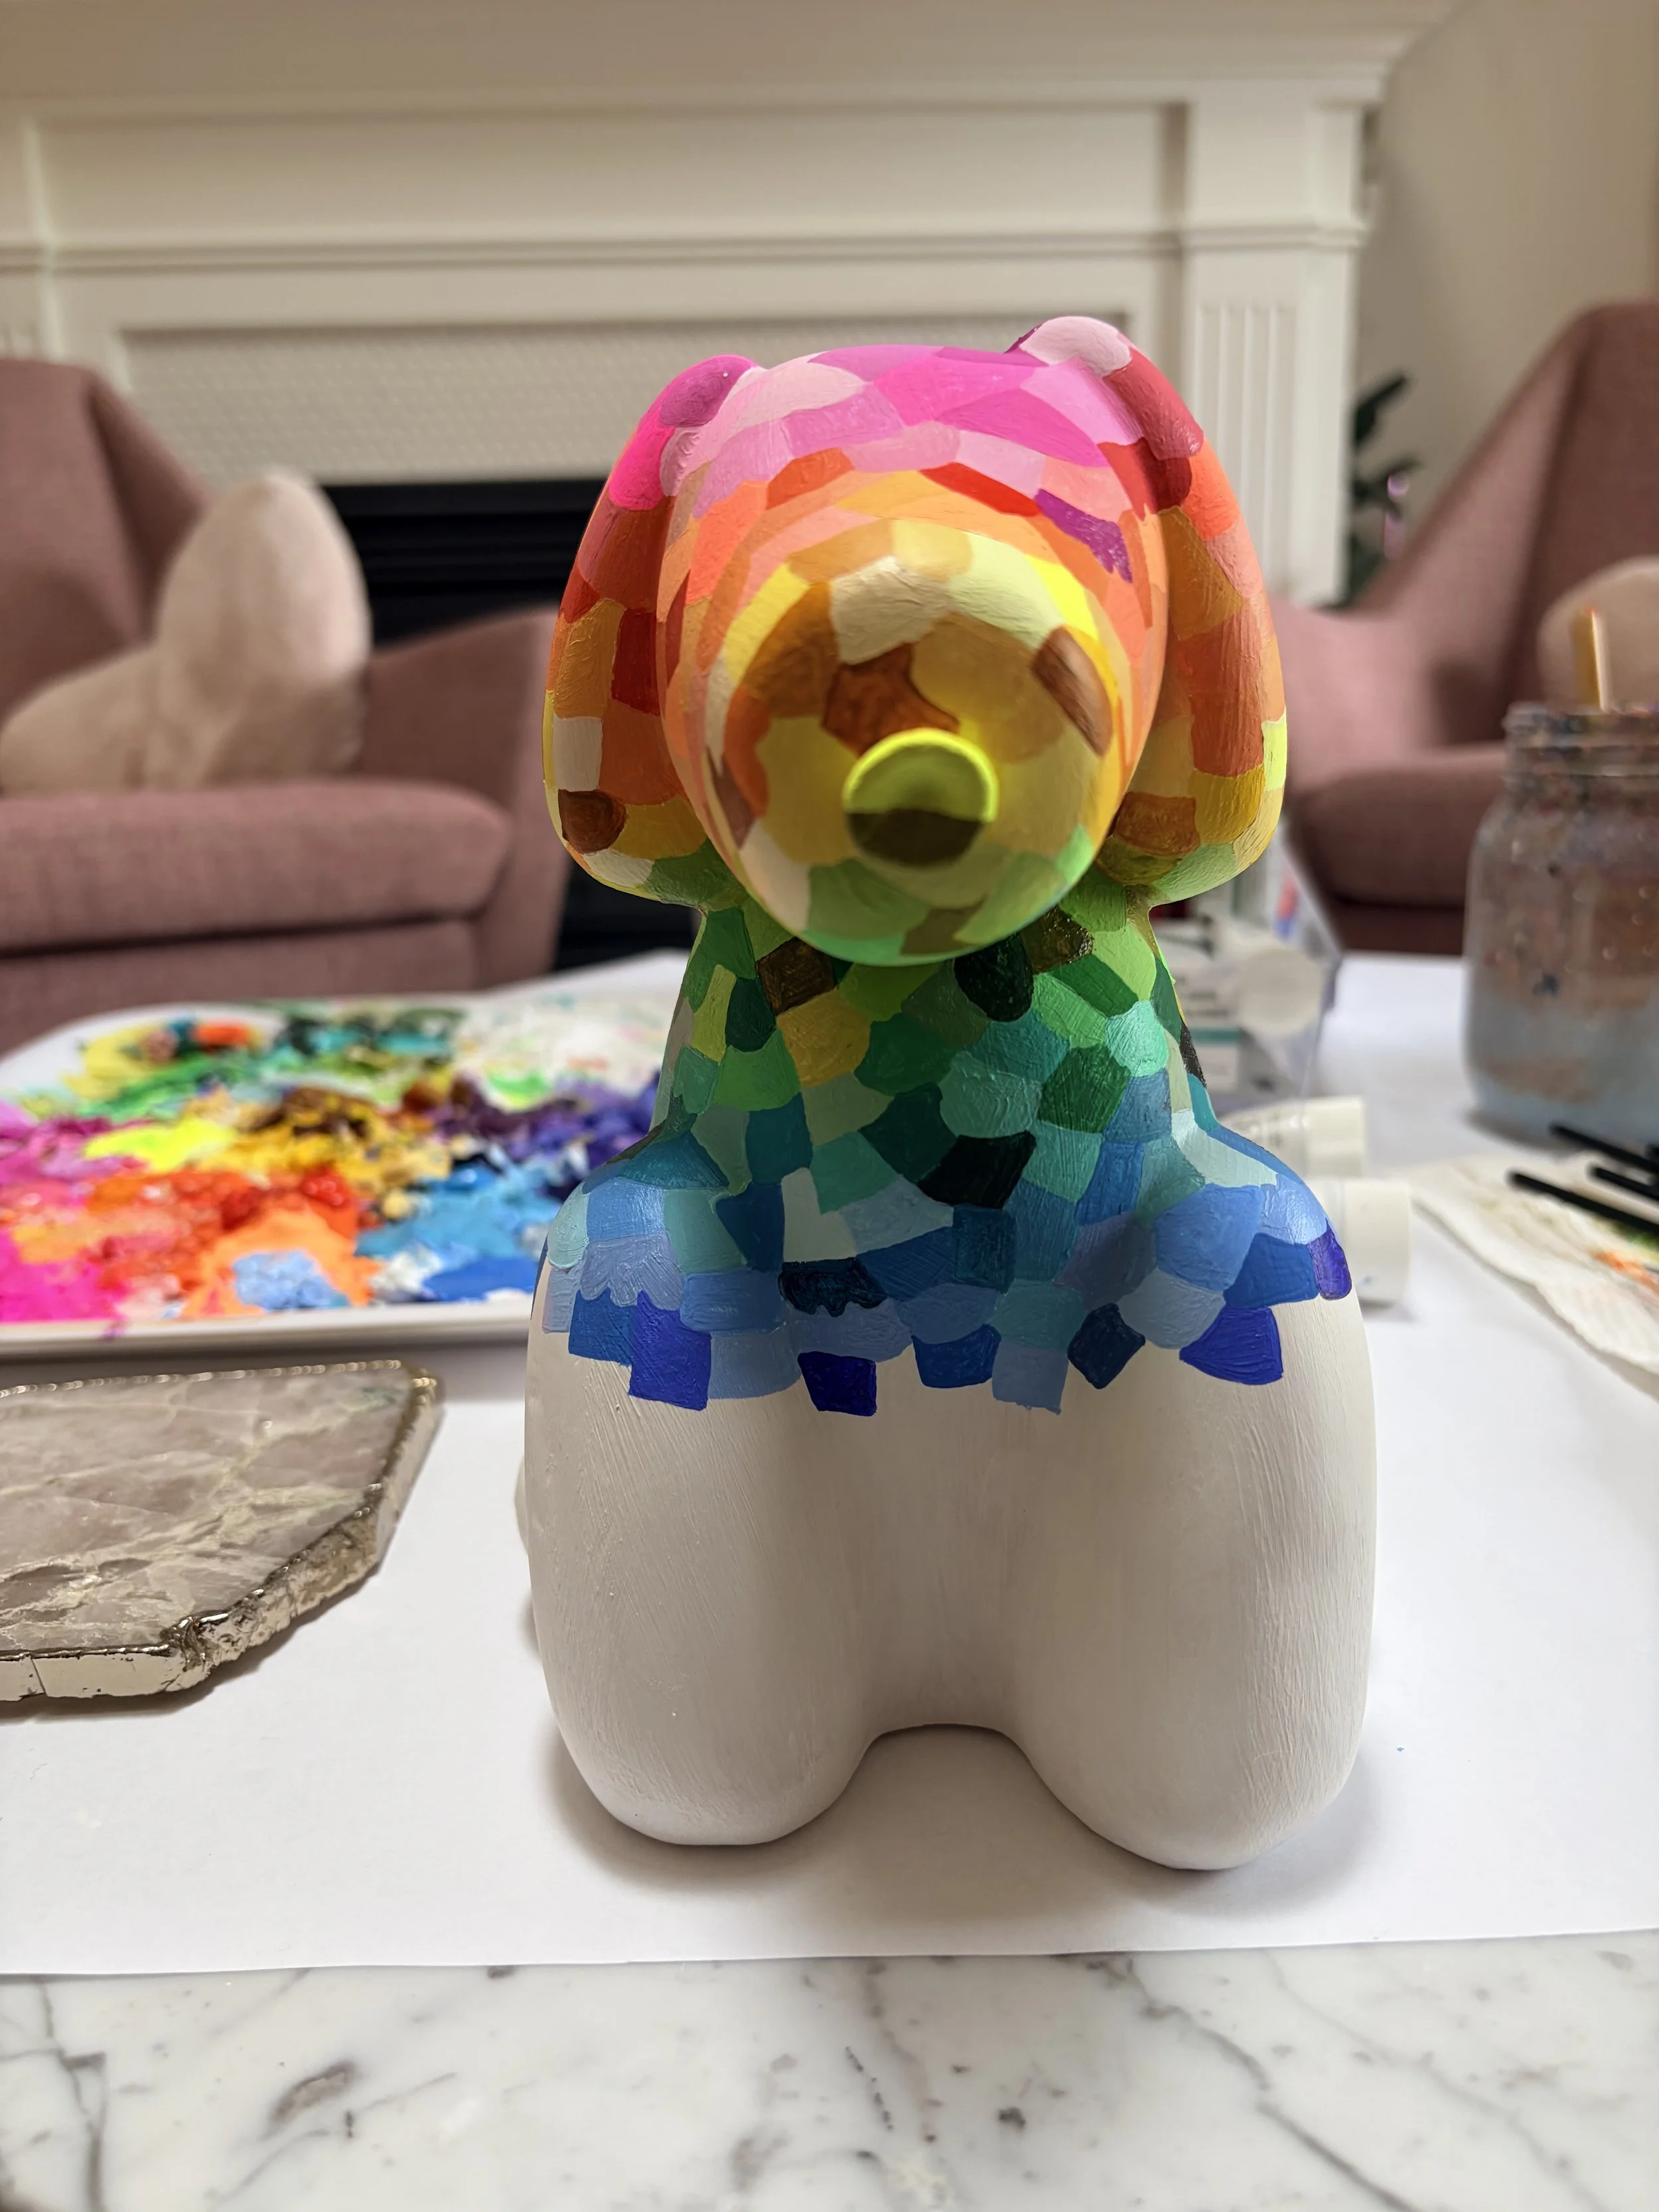
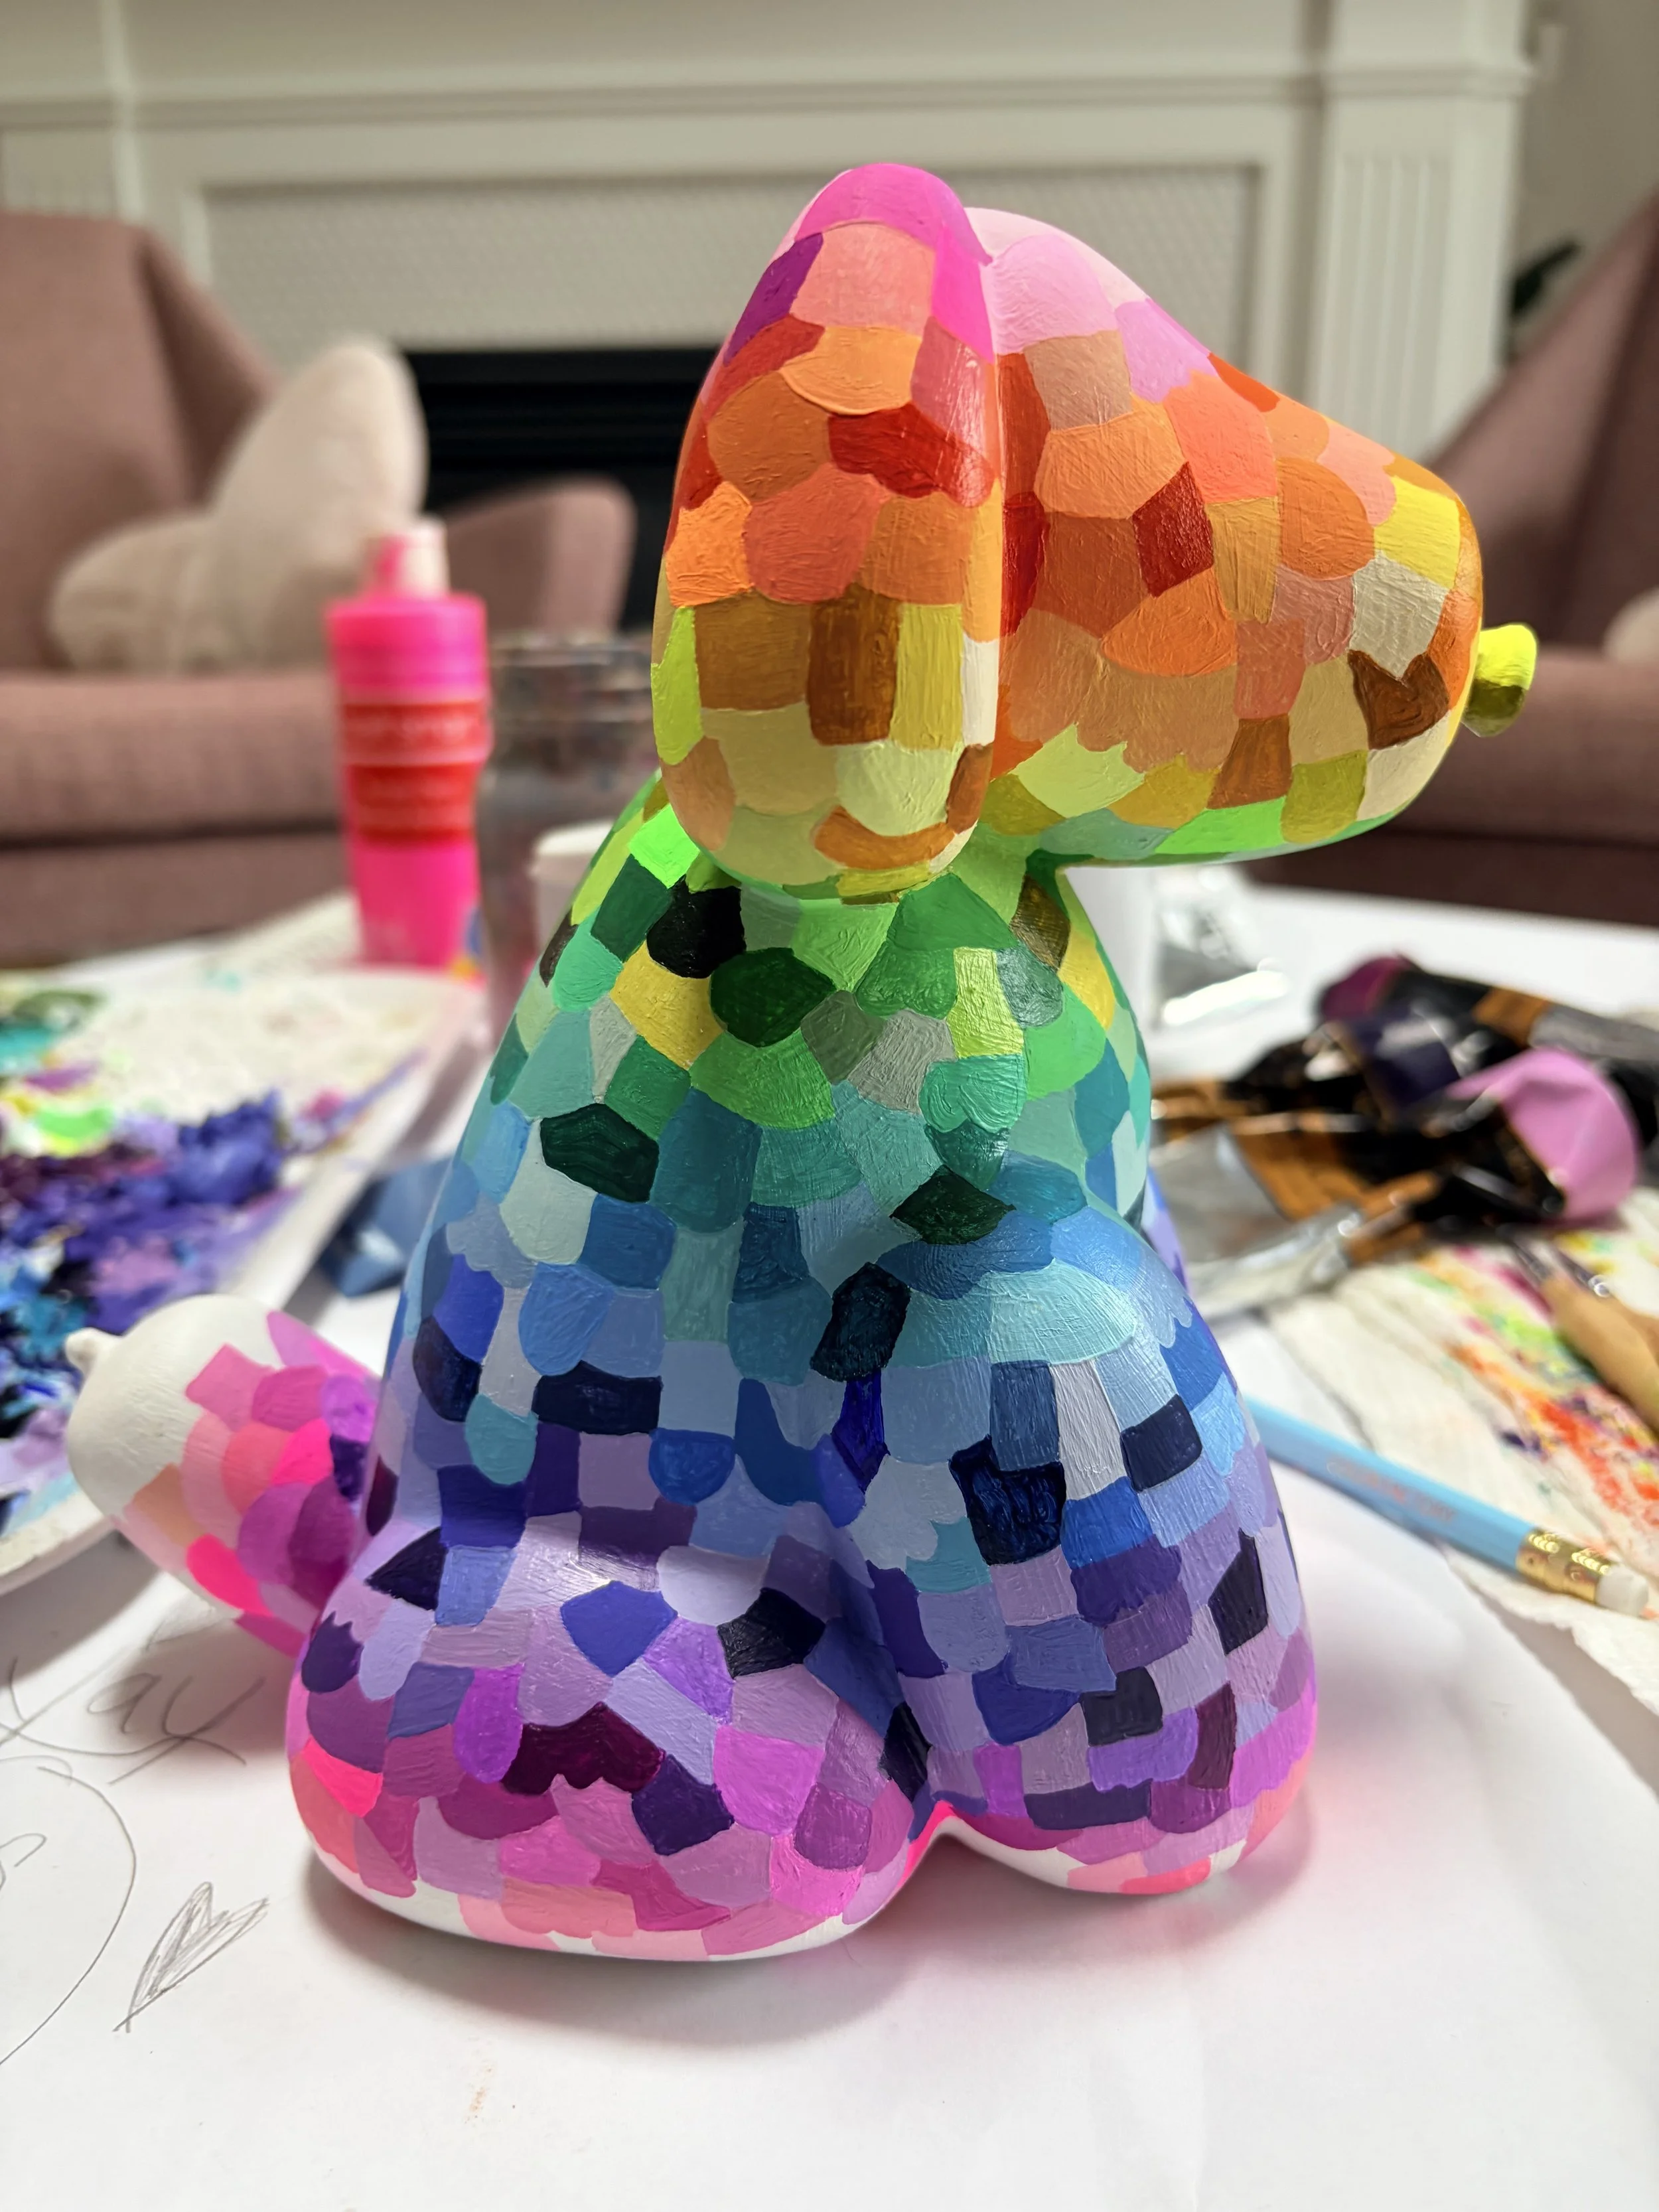
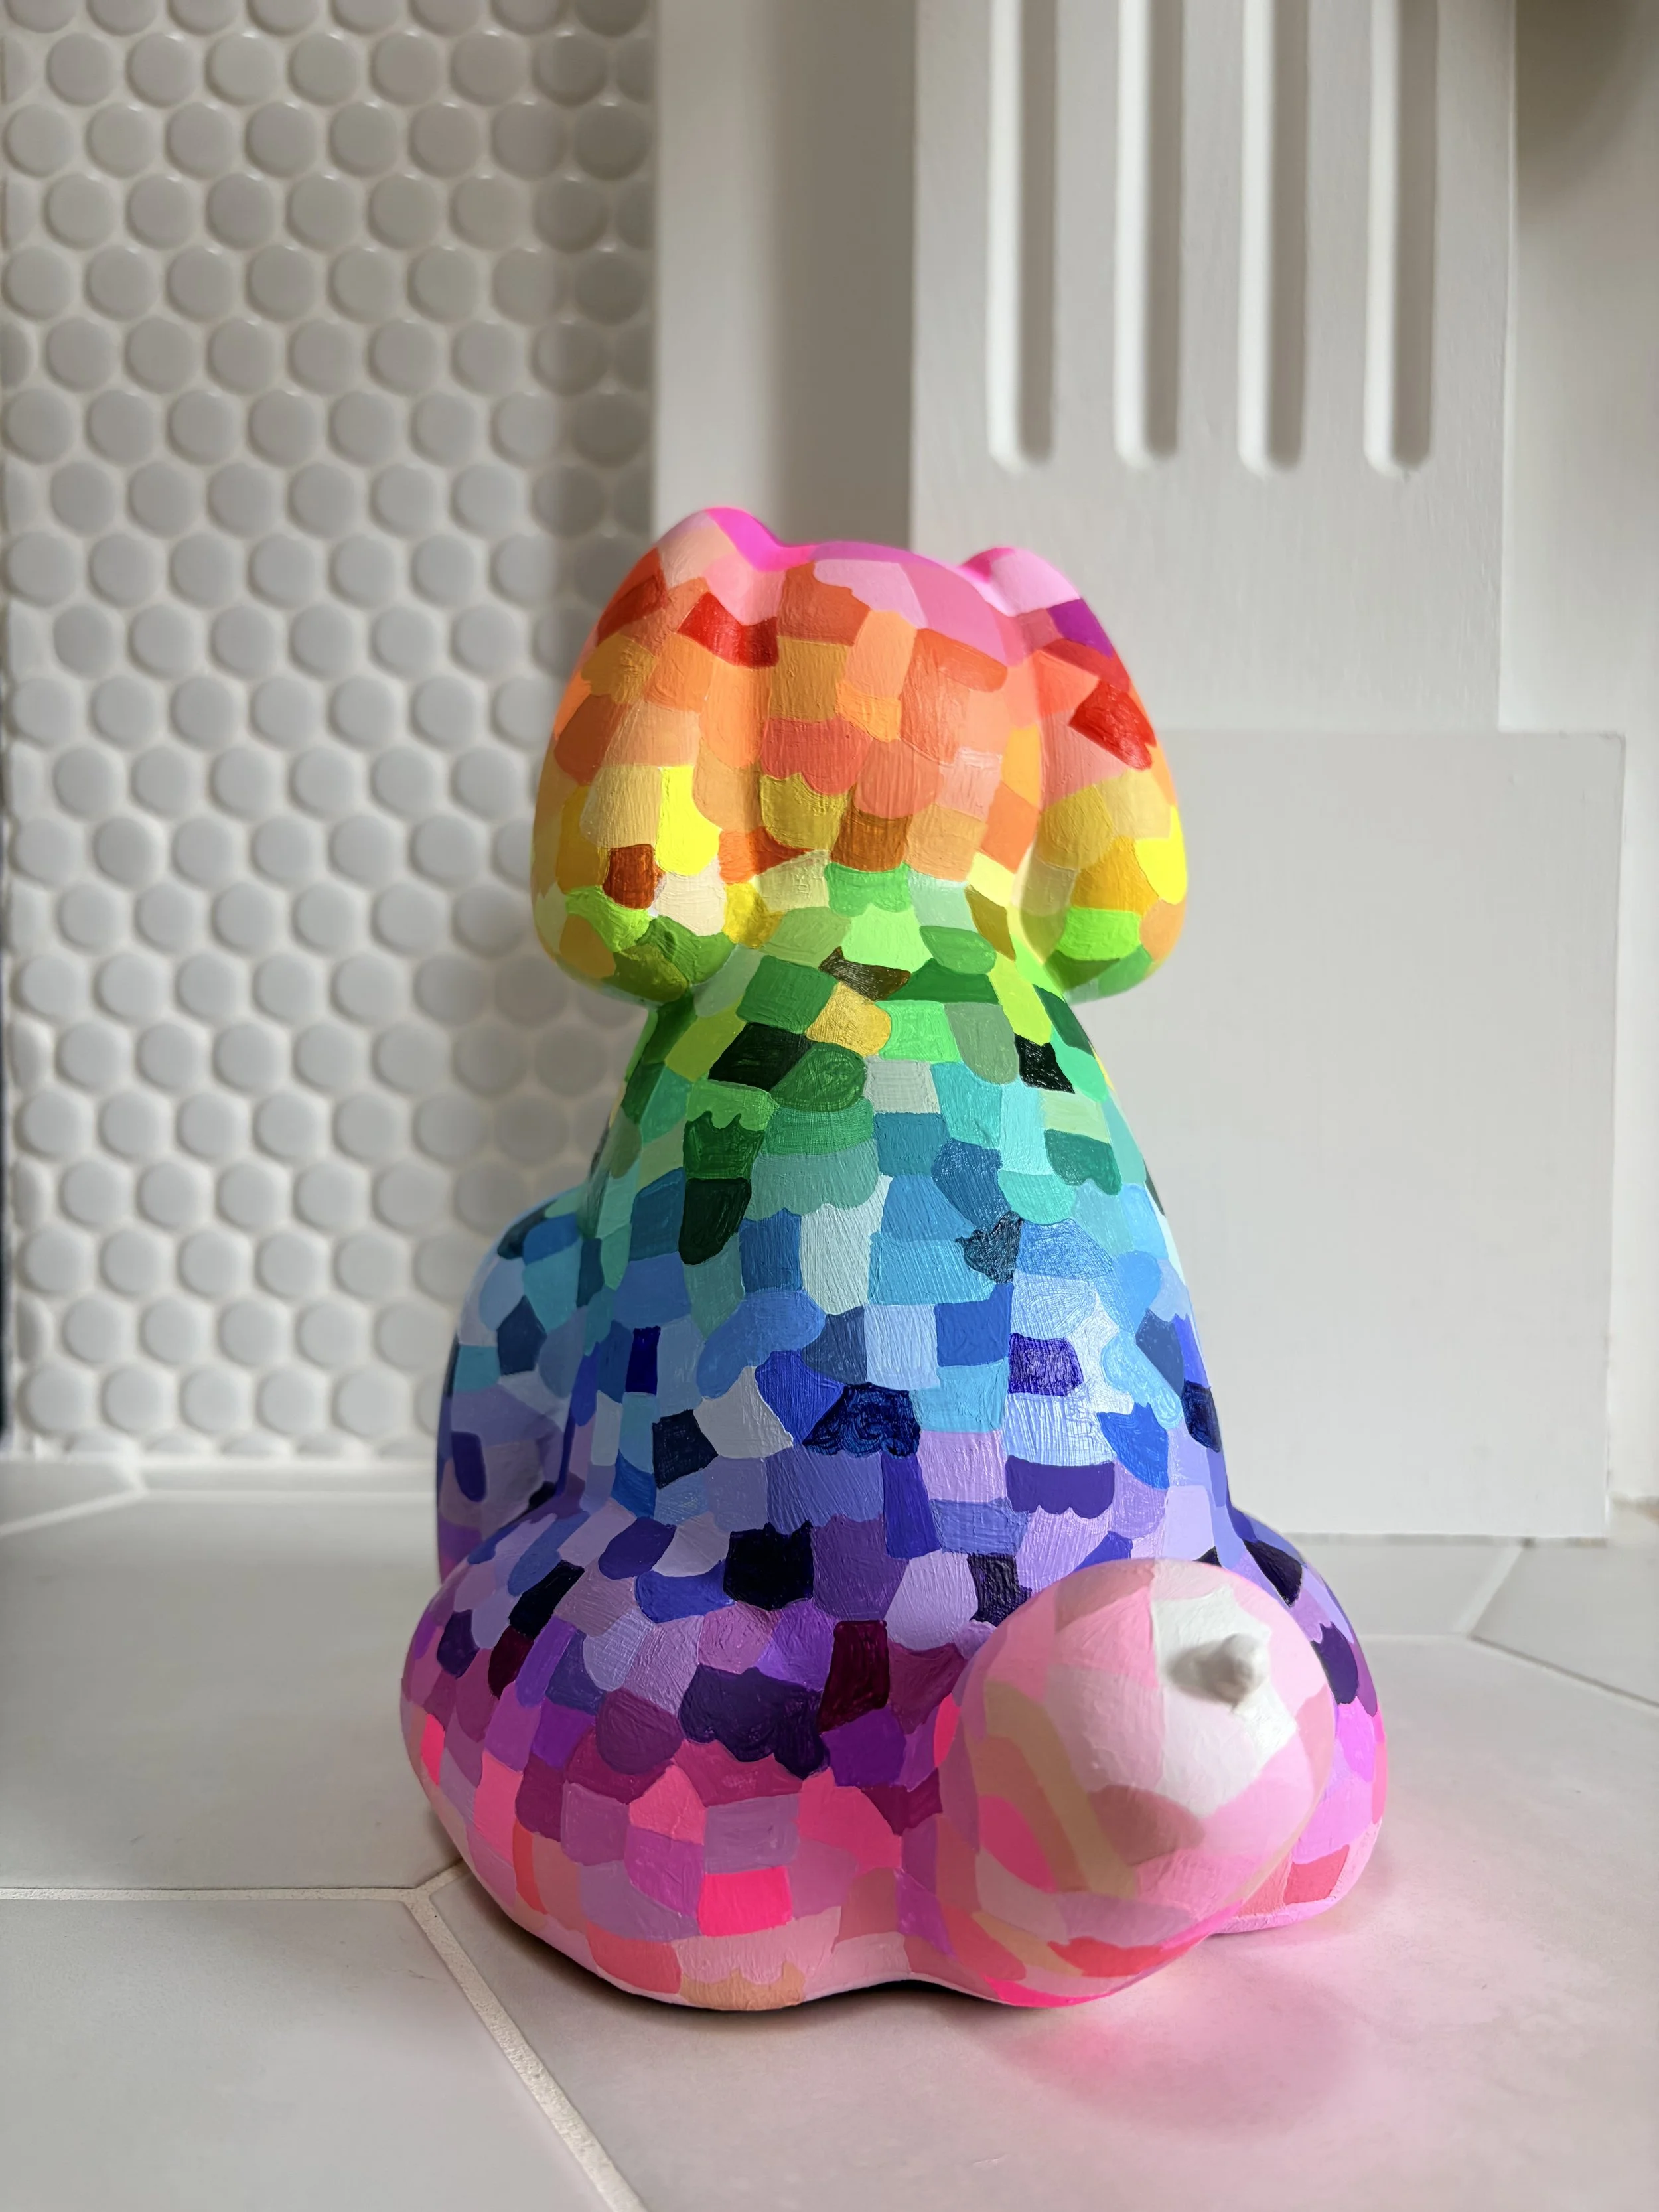
I had this vision in my head. I had done a brilliantly bright sky on my “Happiness Square Number 11 (SOLD OUT) that I thoroughly enjoyed the look of. I decided to recreate the sky I had created out of my little shapes and use it all over the dog, top to bottom.
Finished sky for reference and idea for this project….
I worked on this particular Happiness Square while one of my kiddo’s was home with me. So I pulled out their toddler art table as I always do, and did the painting there. They have seen Mom painting since they were born.
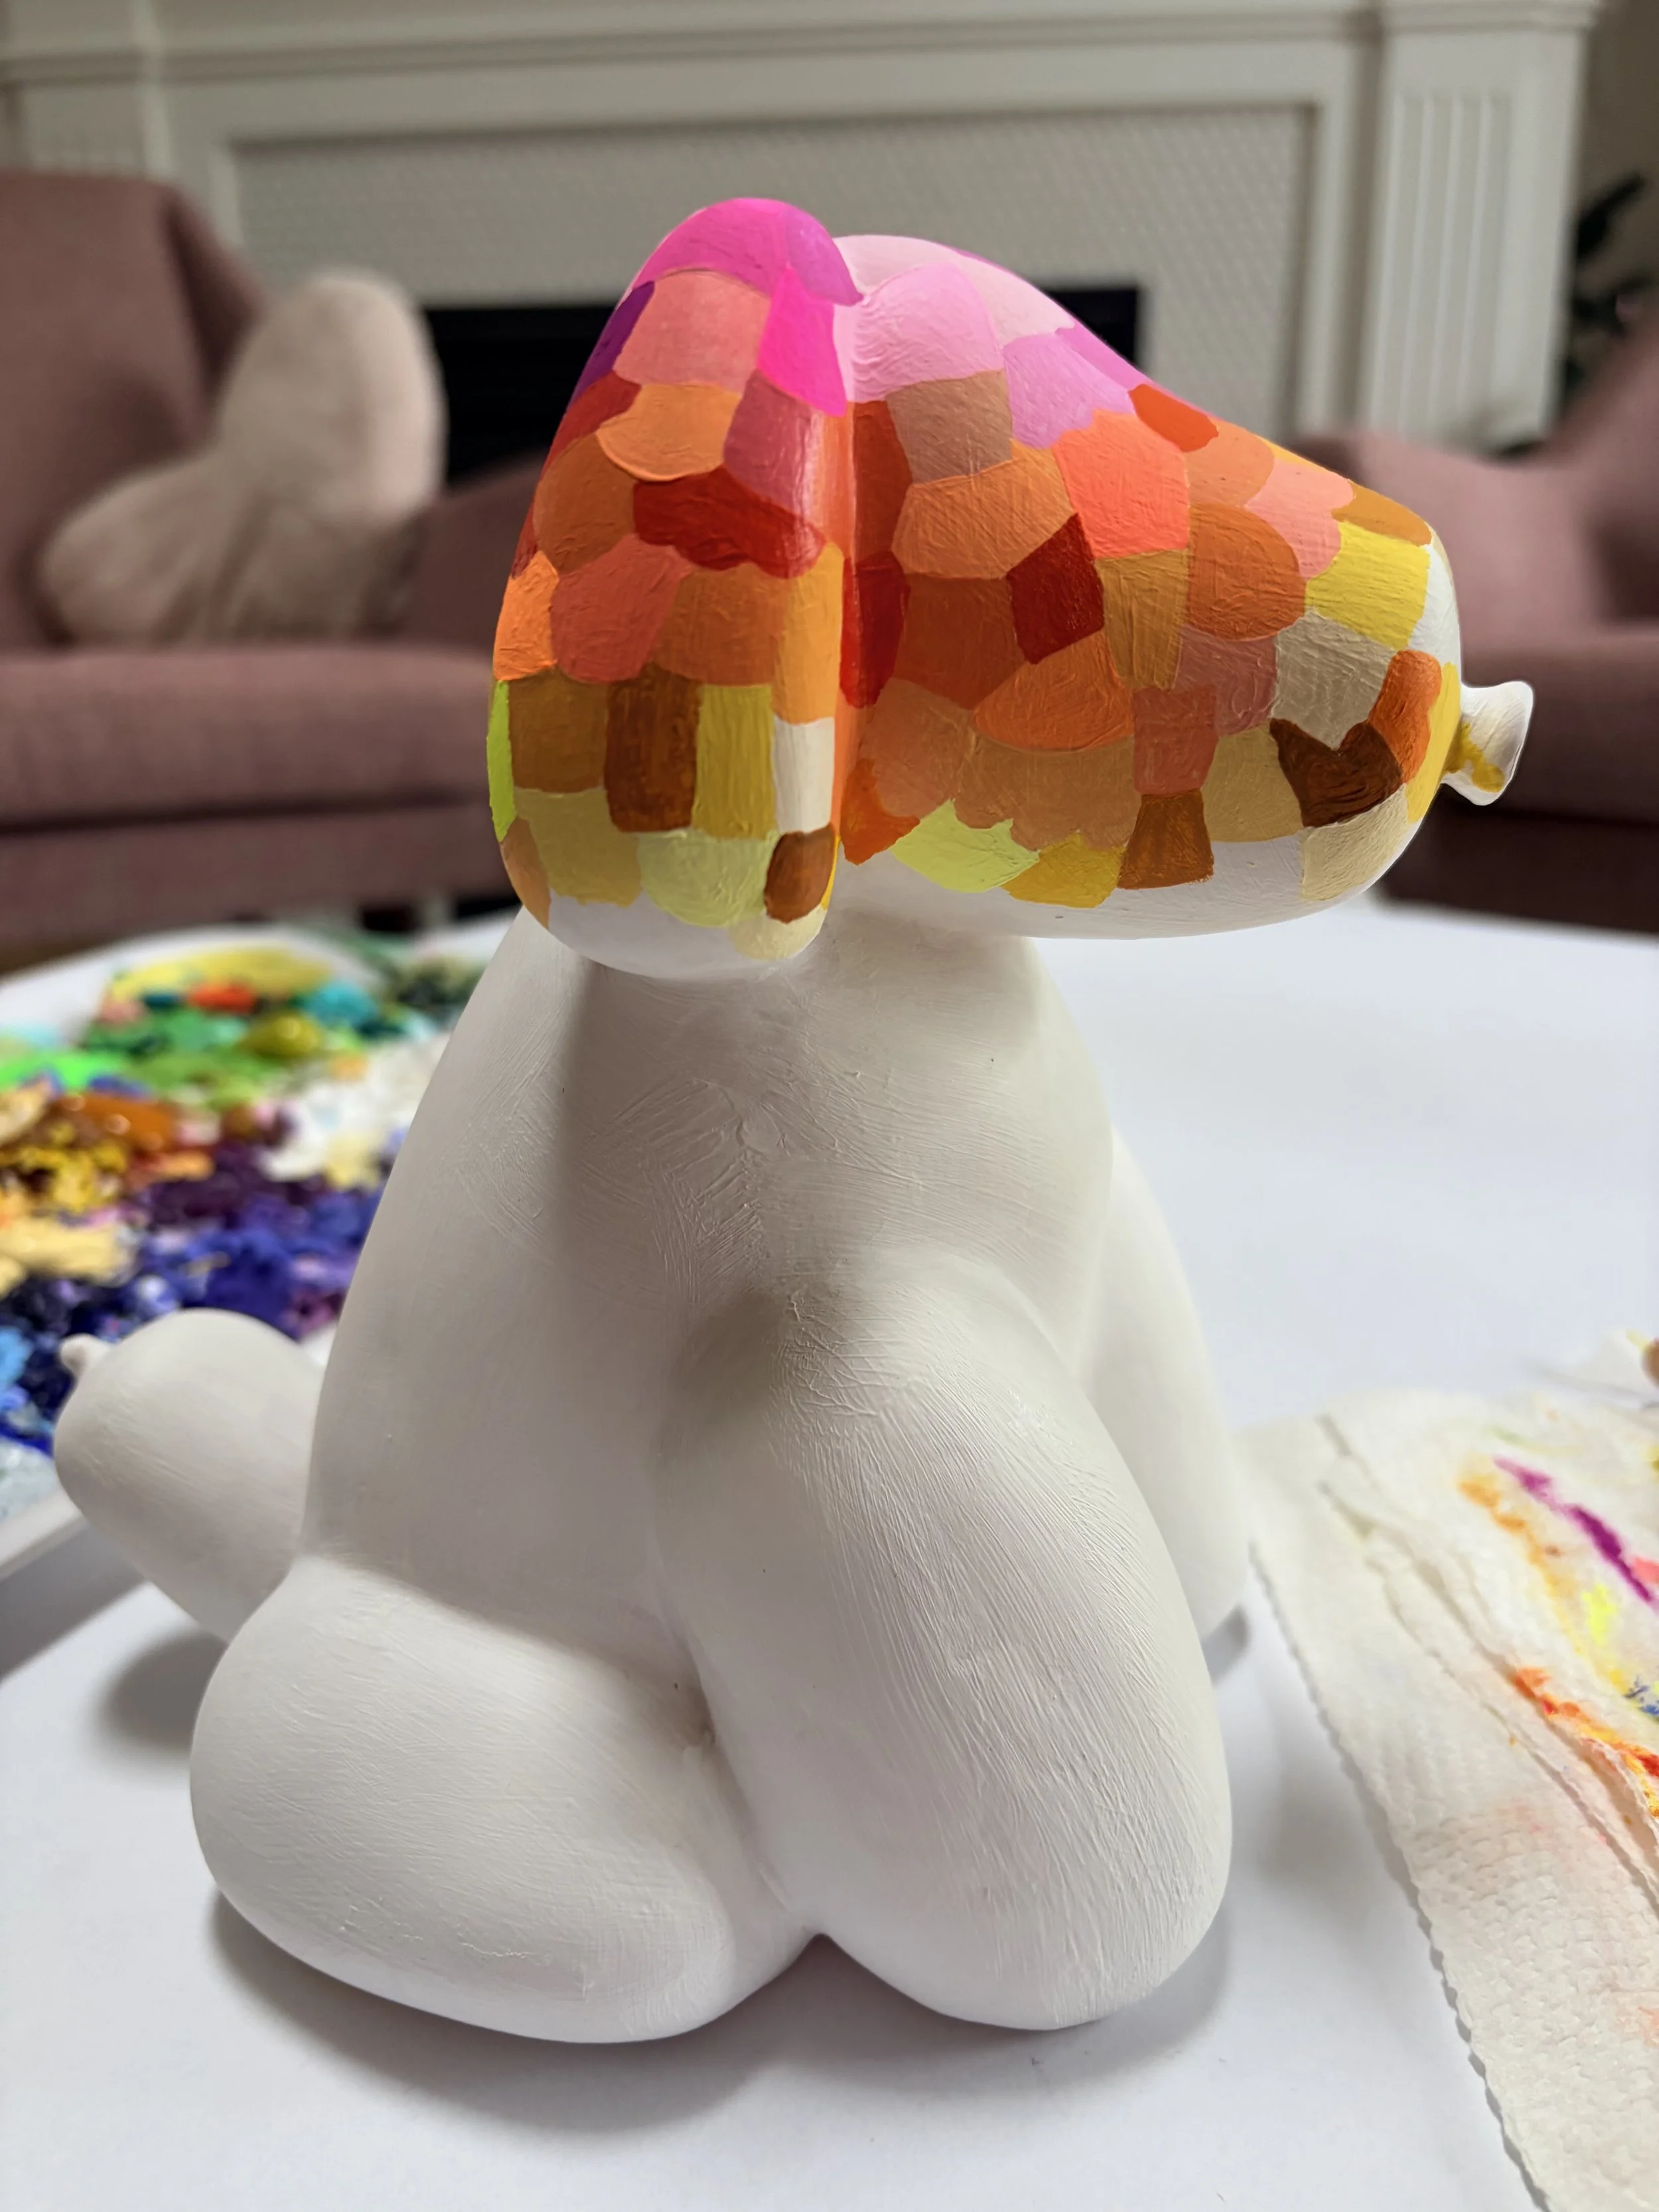
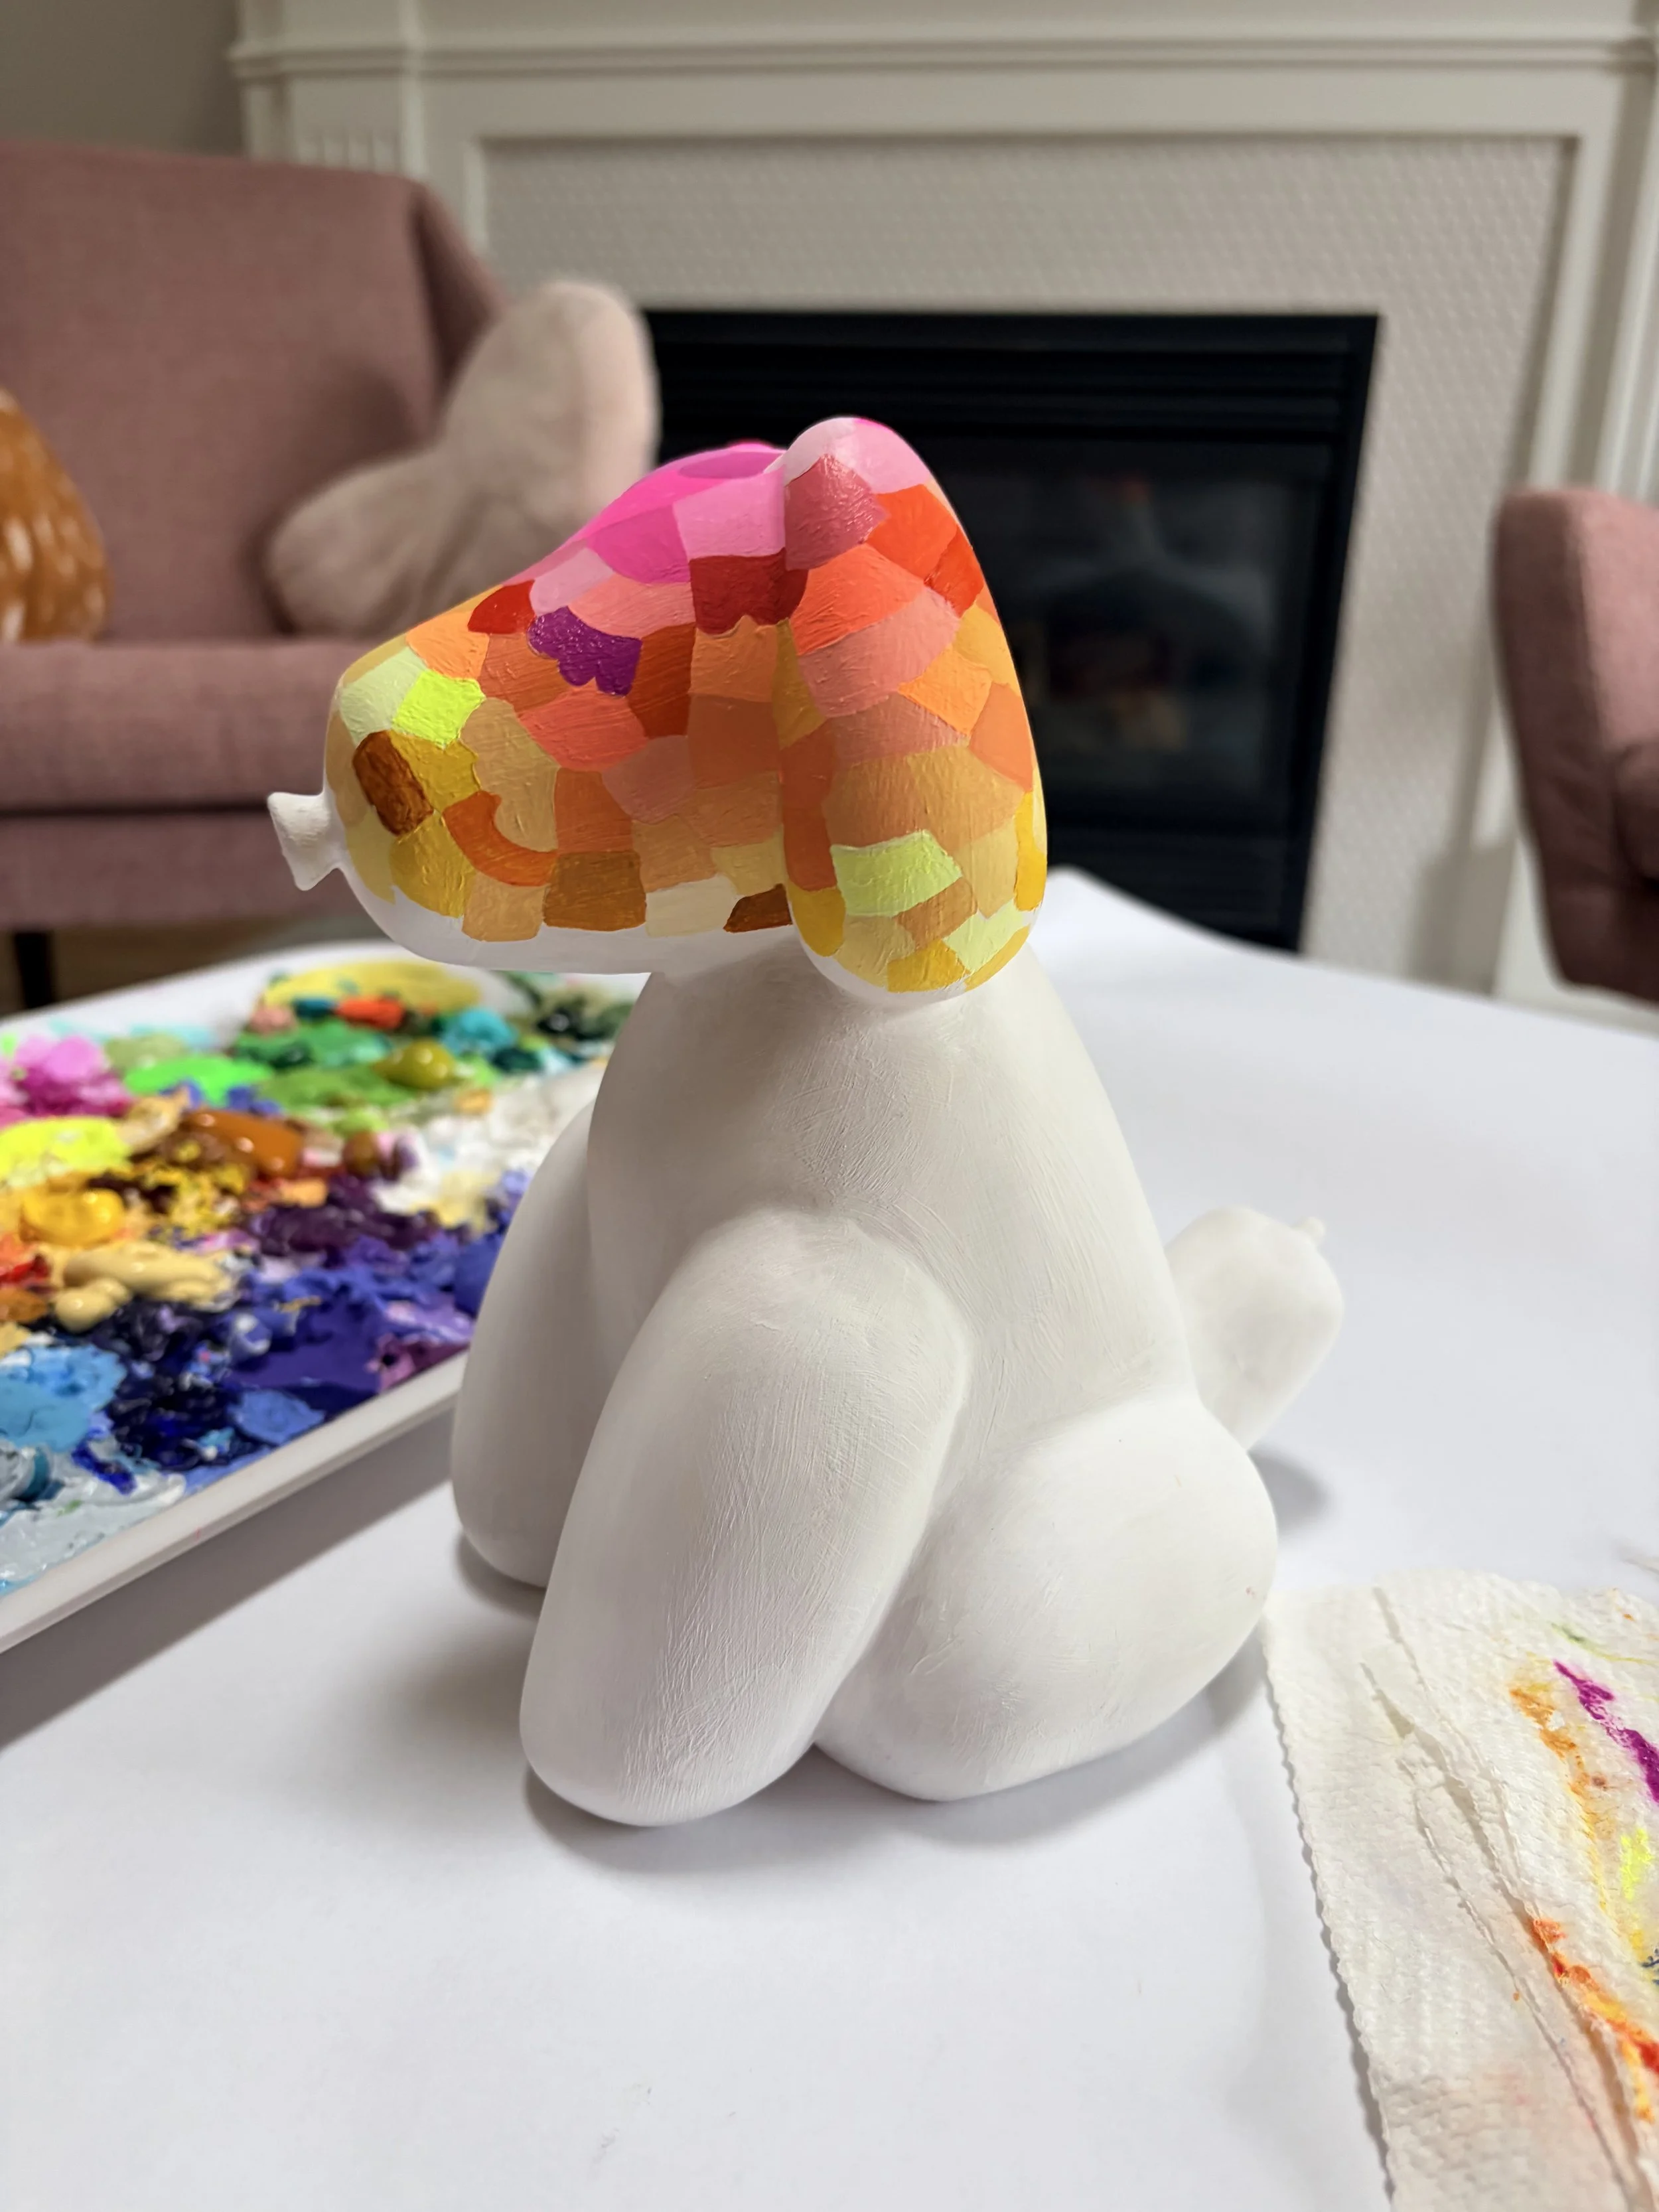
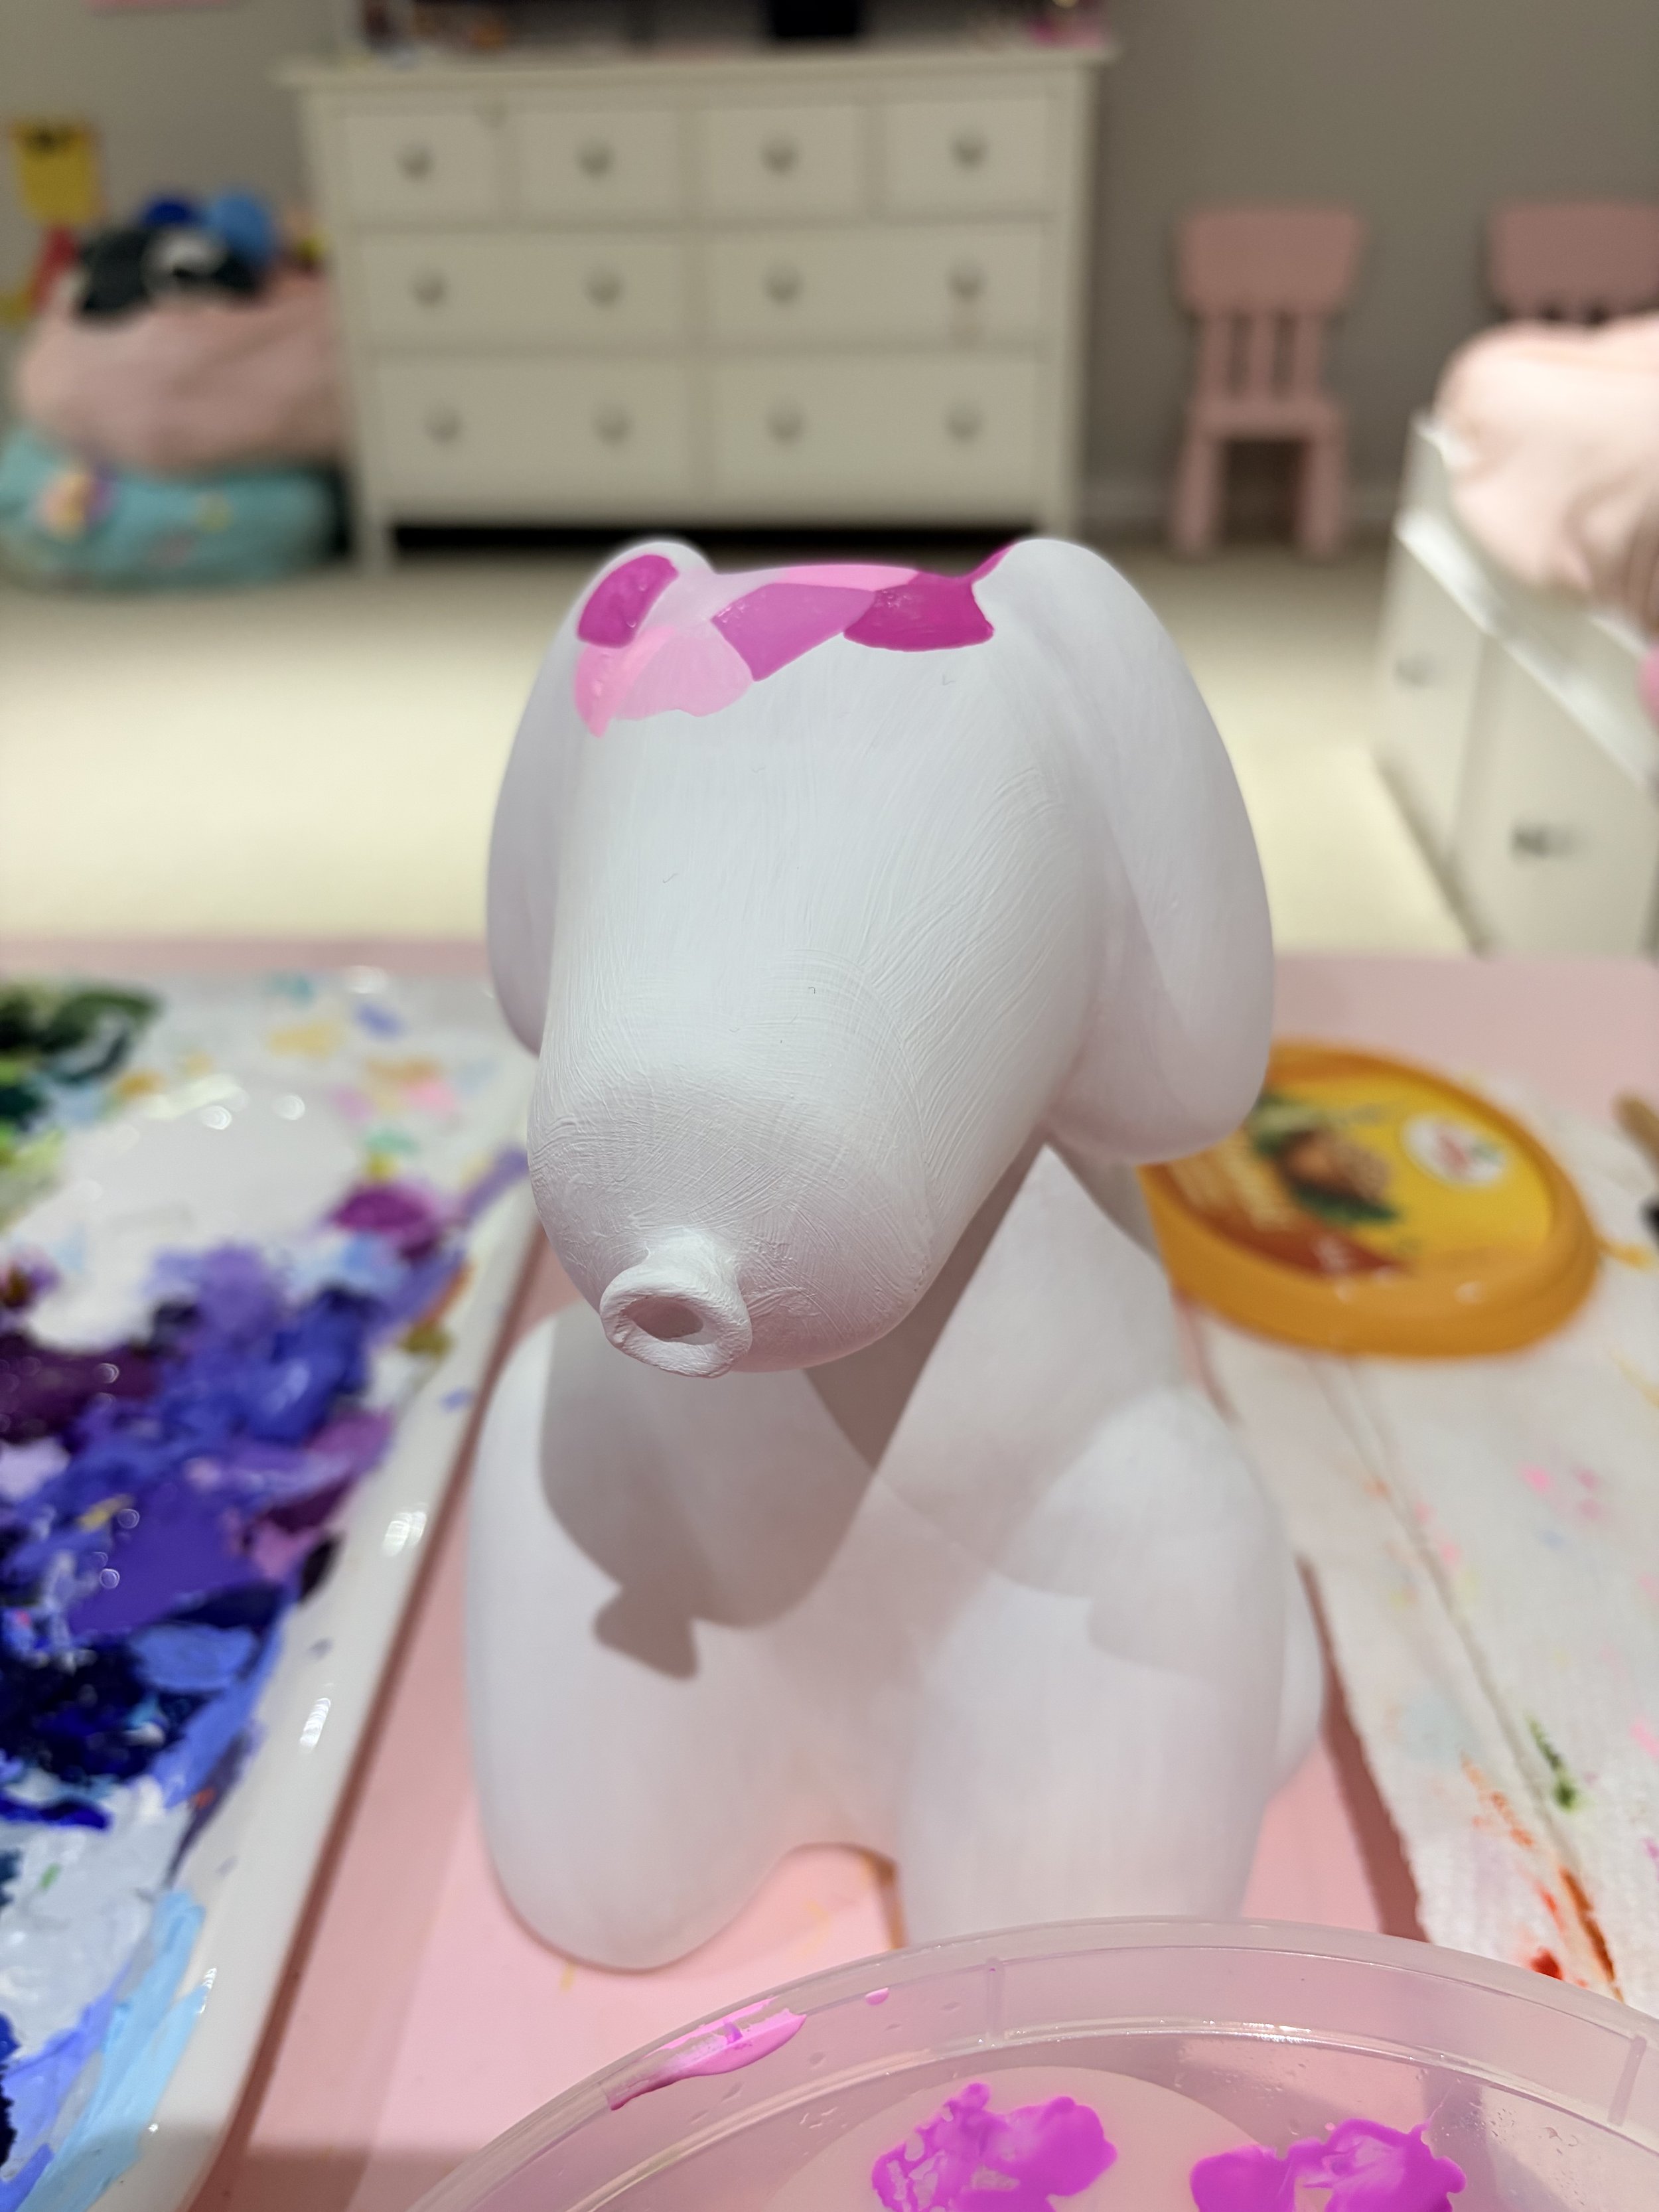
Still figuring things out as I worked on the Orange to Yellow transition. I also wasn’t sure what the plan would be for the nose/balloon nub. I figured it would be somewhat of a later decision as I could see the dog mostly complete and make a more informed decision.
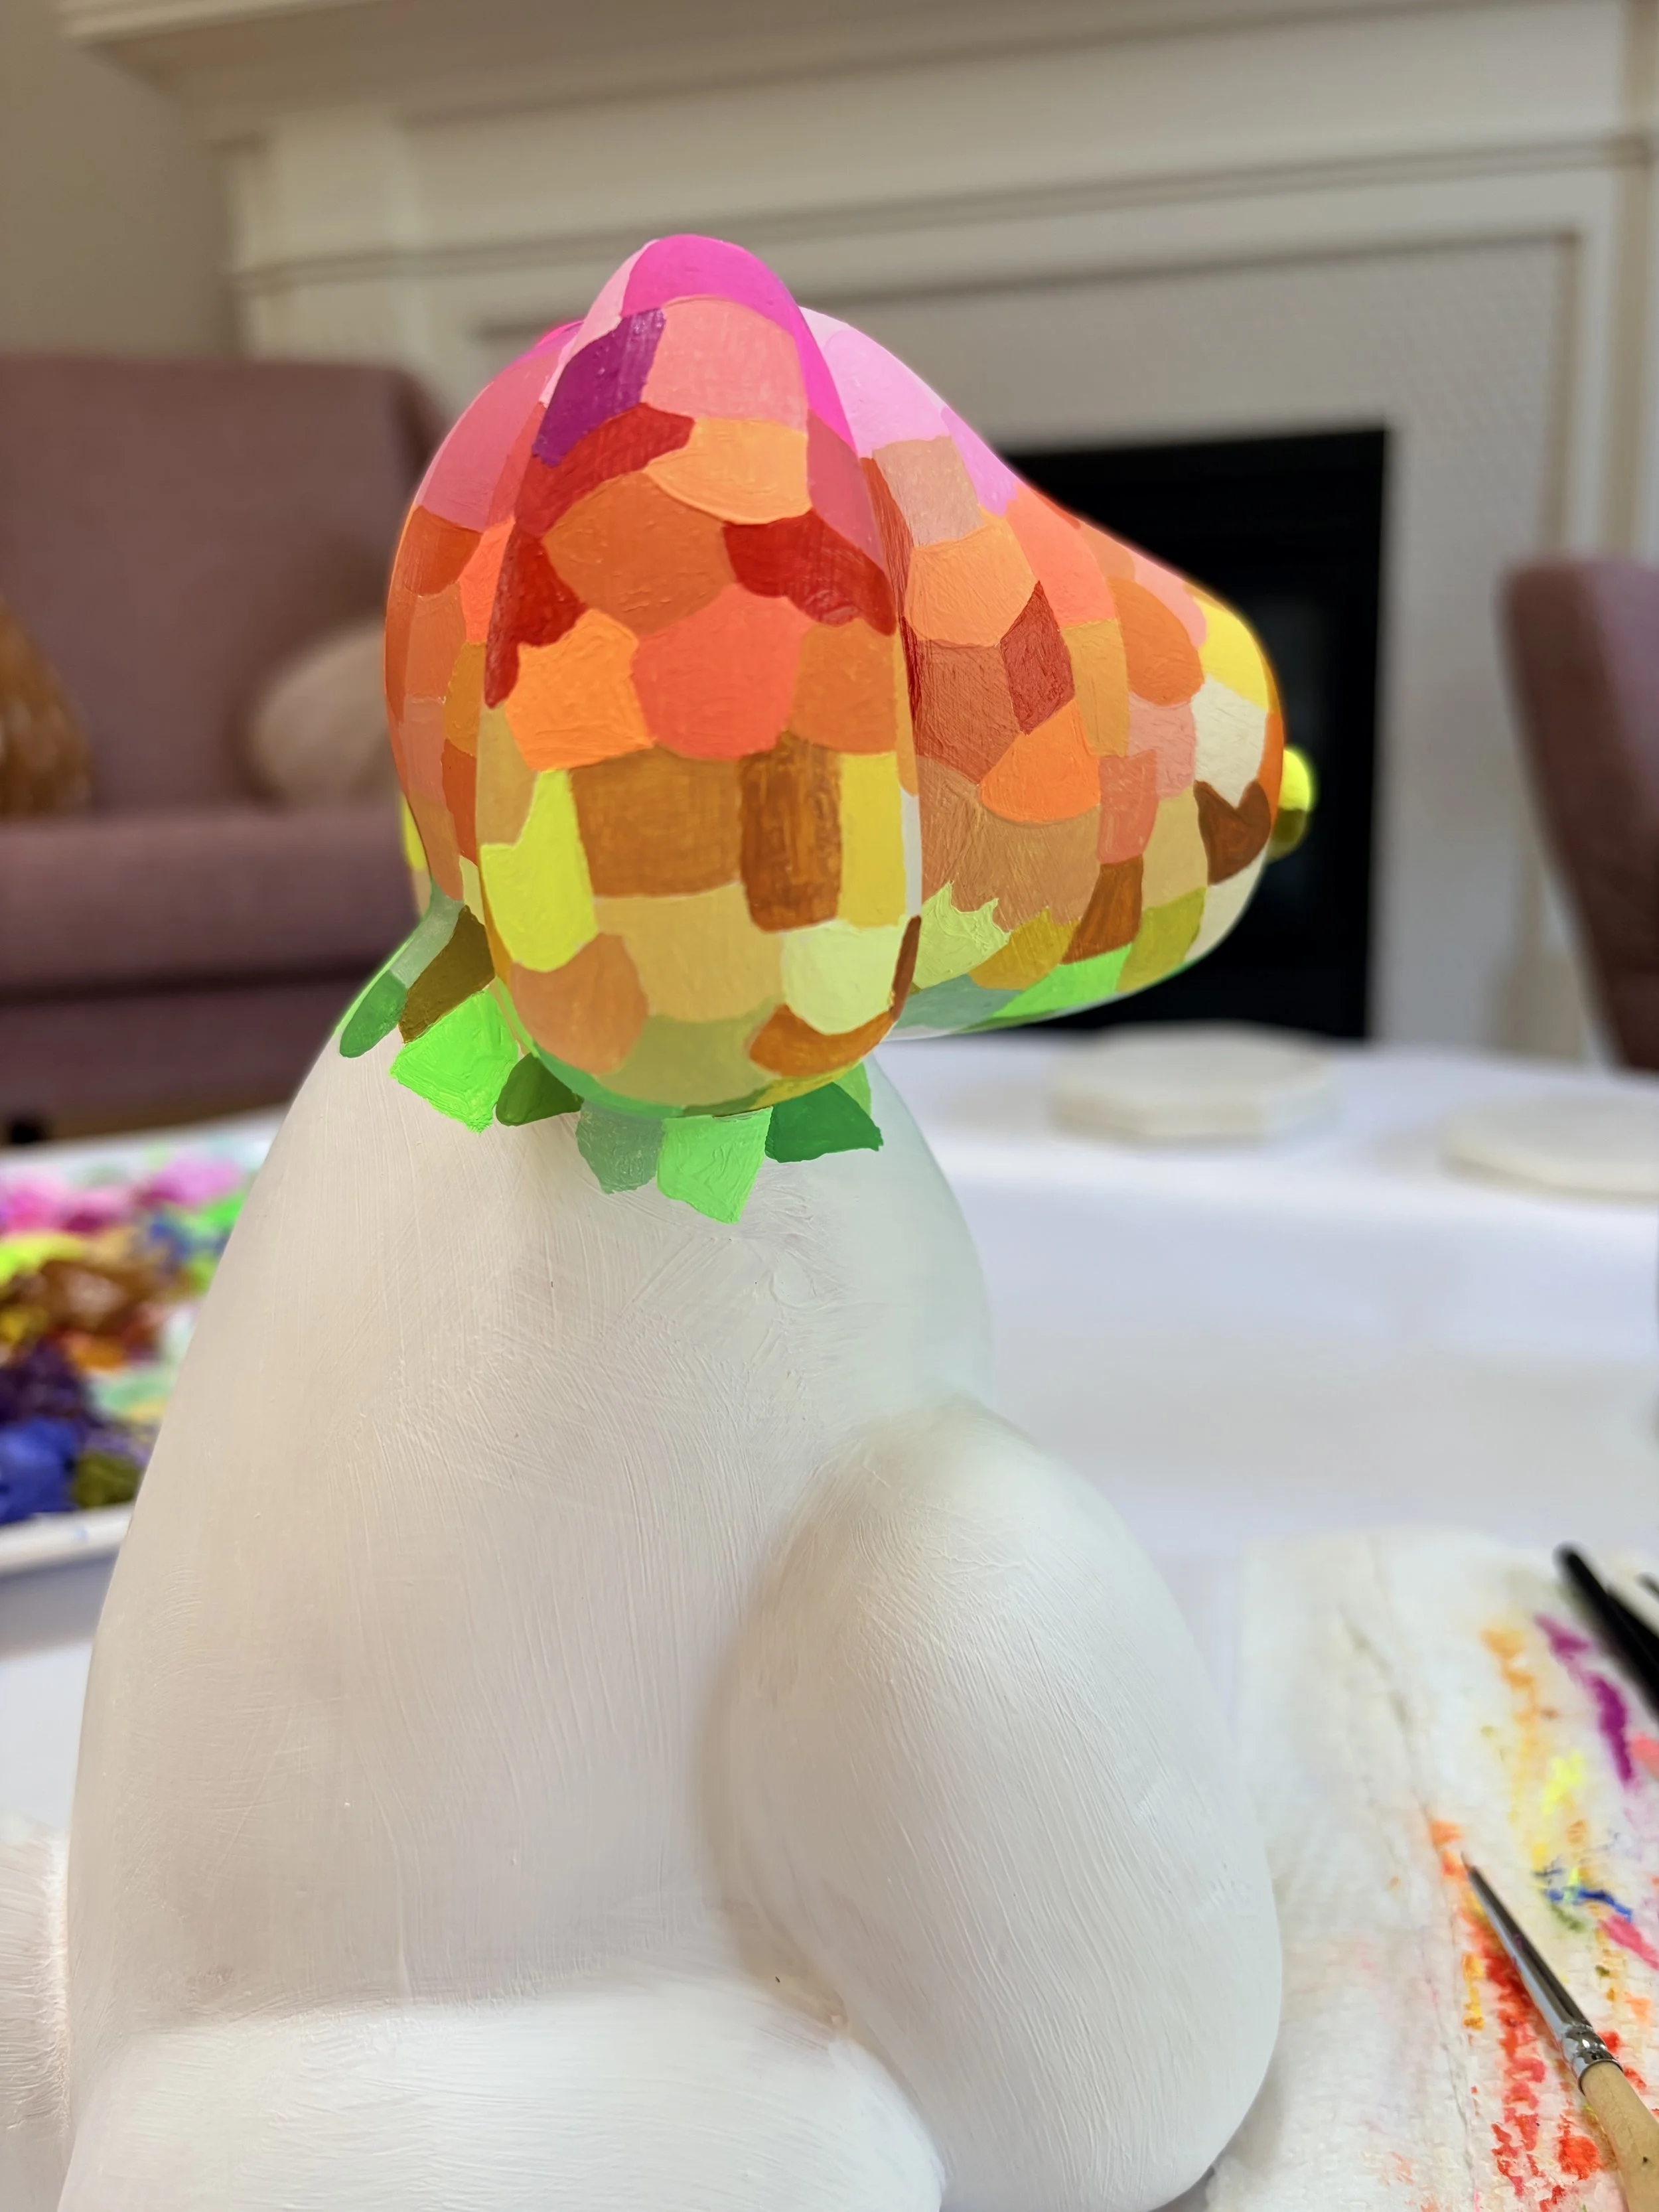
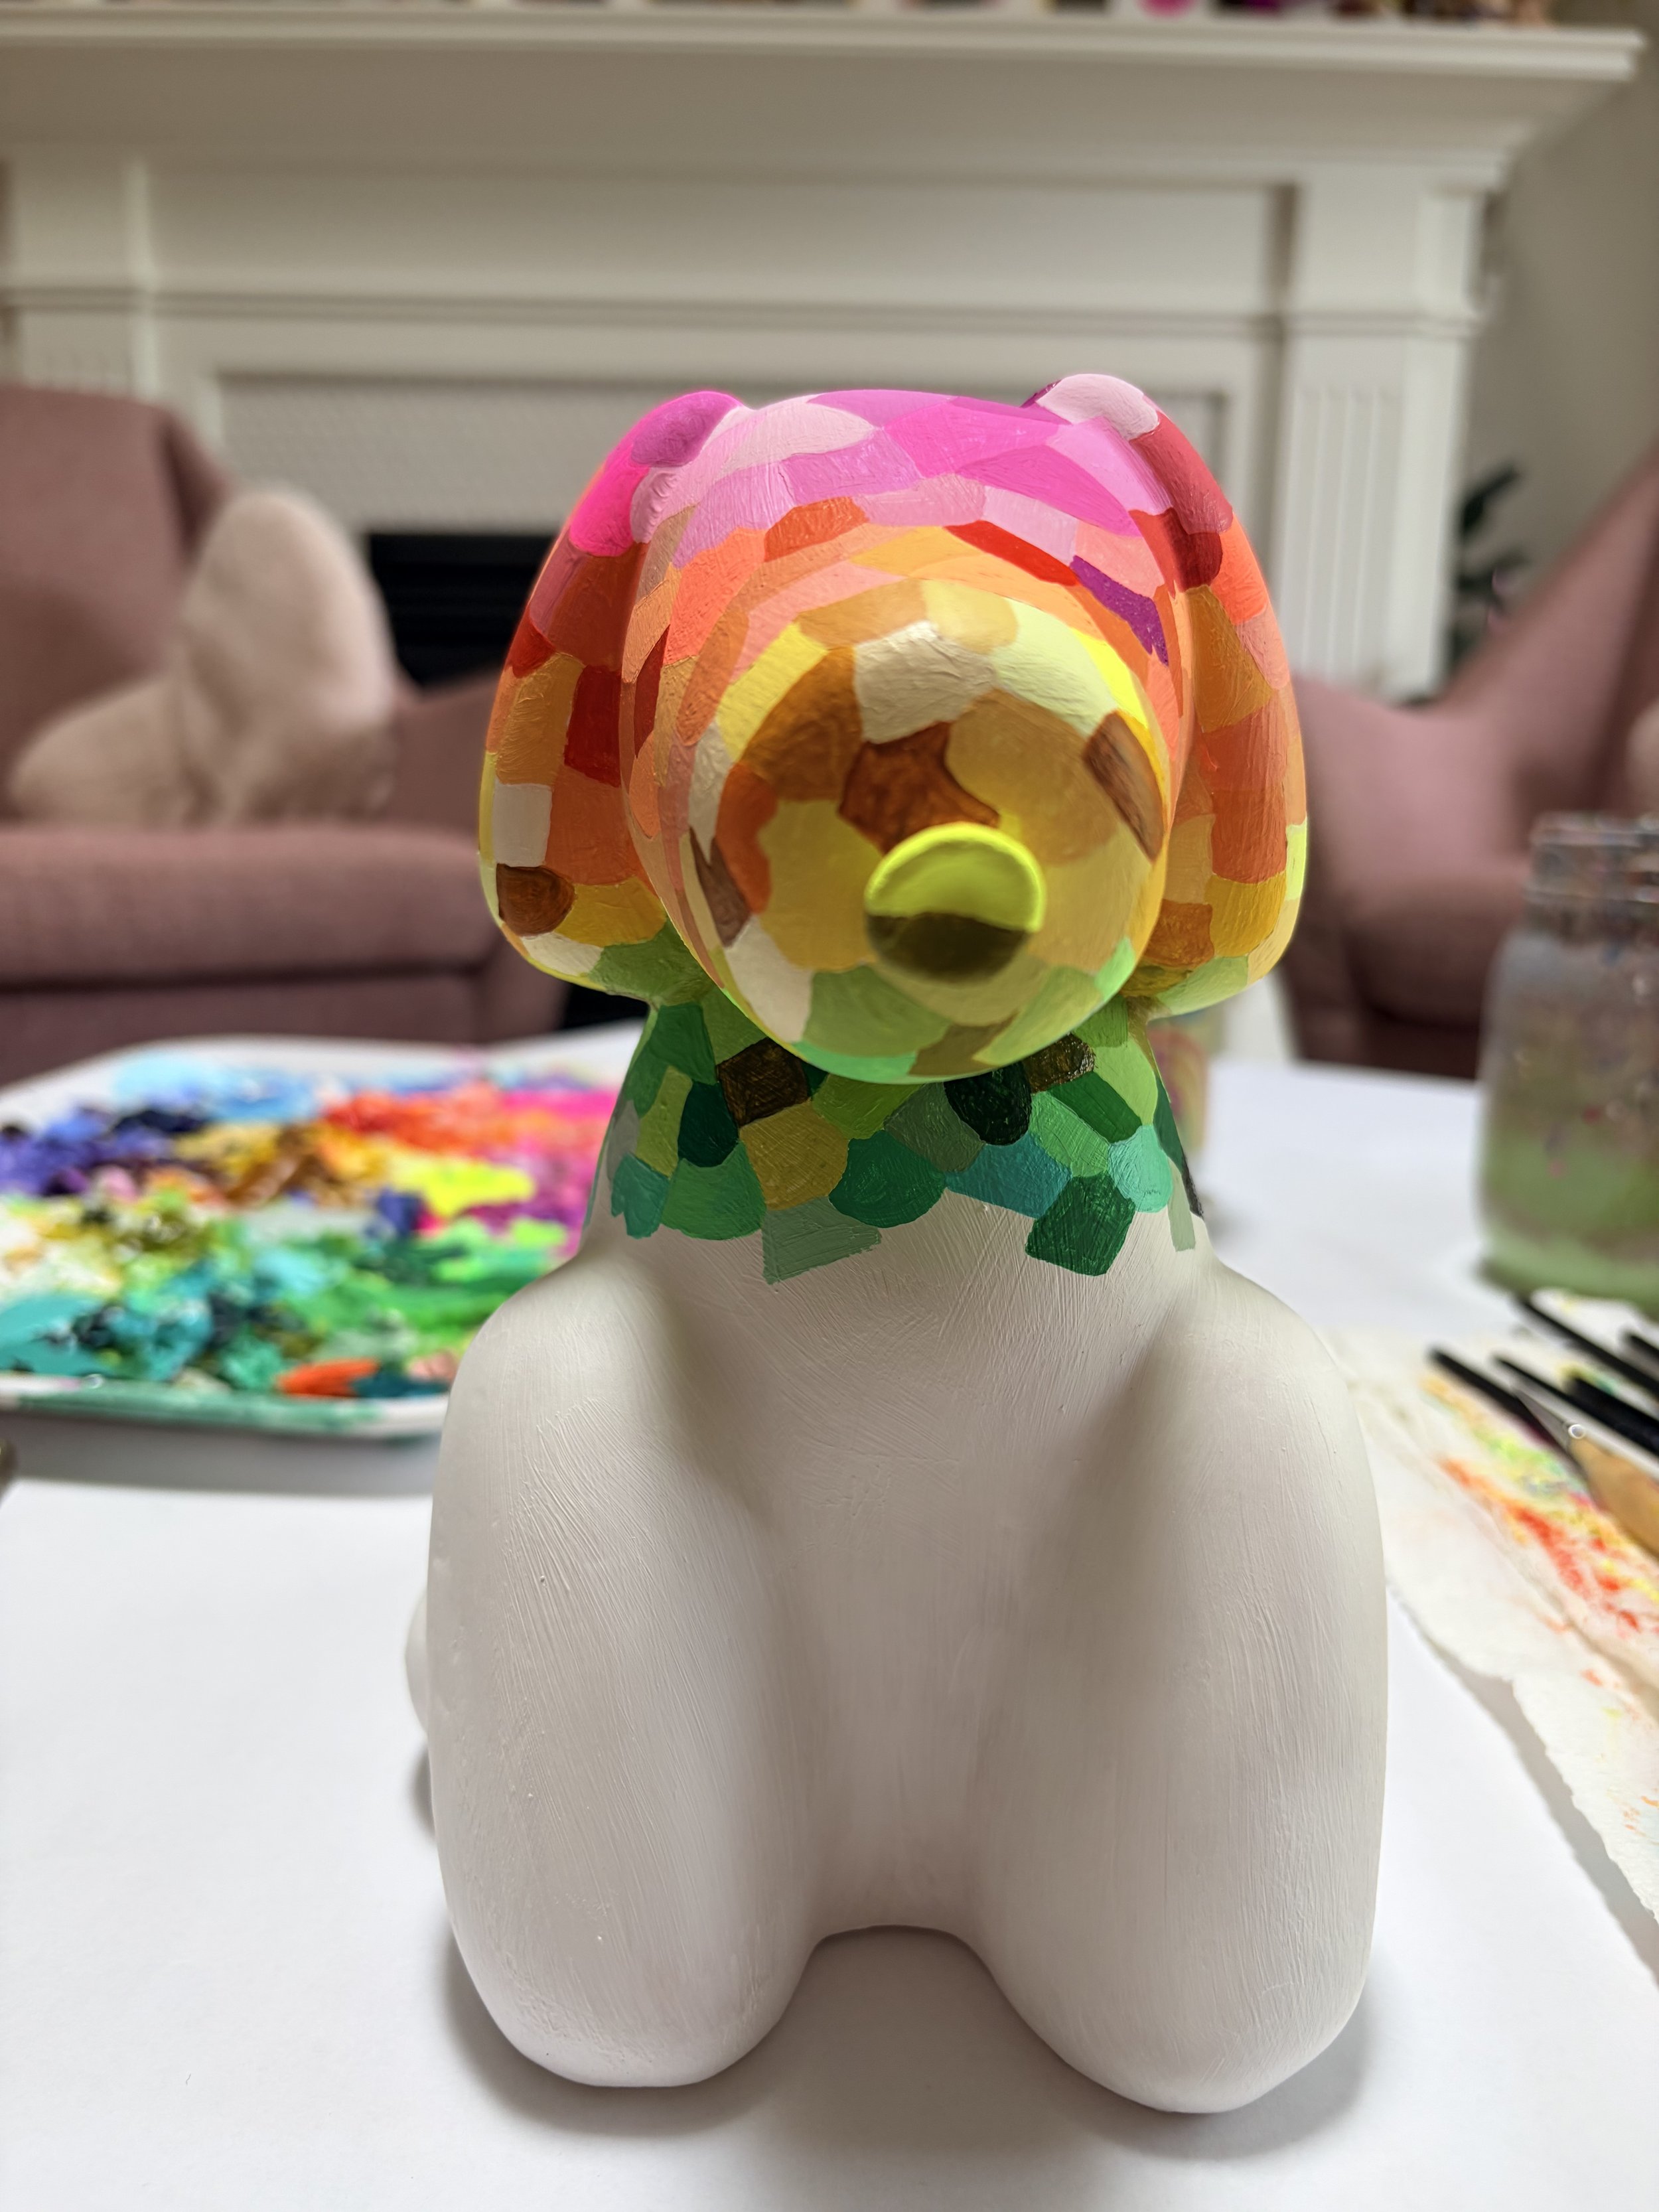
It was starting to look really cool by the time I had the green pretty established. I was getting excited. If you know me- the brighter the better- and I liked how my choice to include the fluorescent colour options in this dog really brought the right amount of pop to her.
As I was excited: little did I know just how labor intensive this One of a Kind Dog was going to be. I was still full of energy for the project at this point.

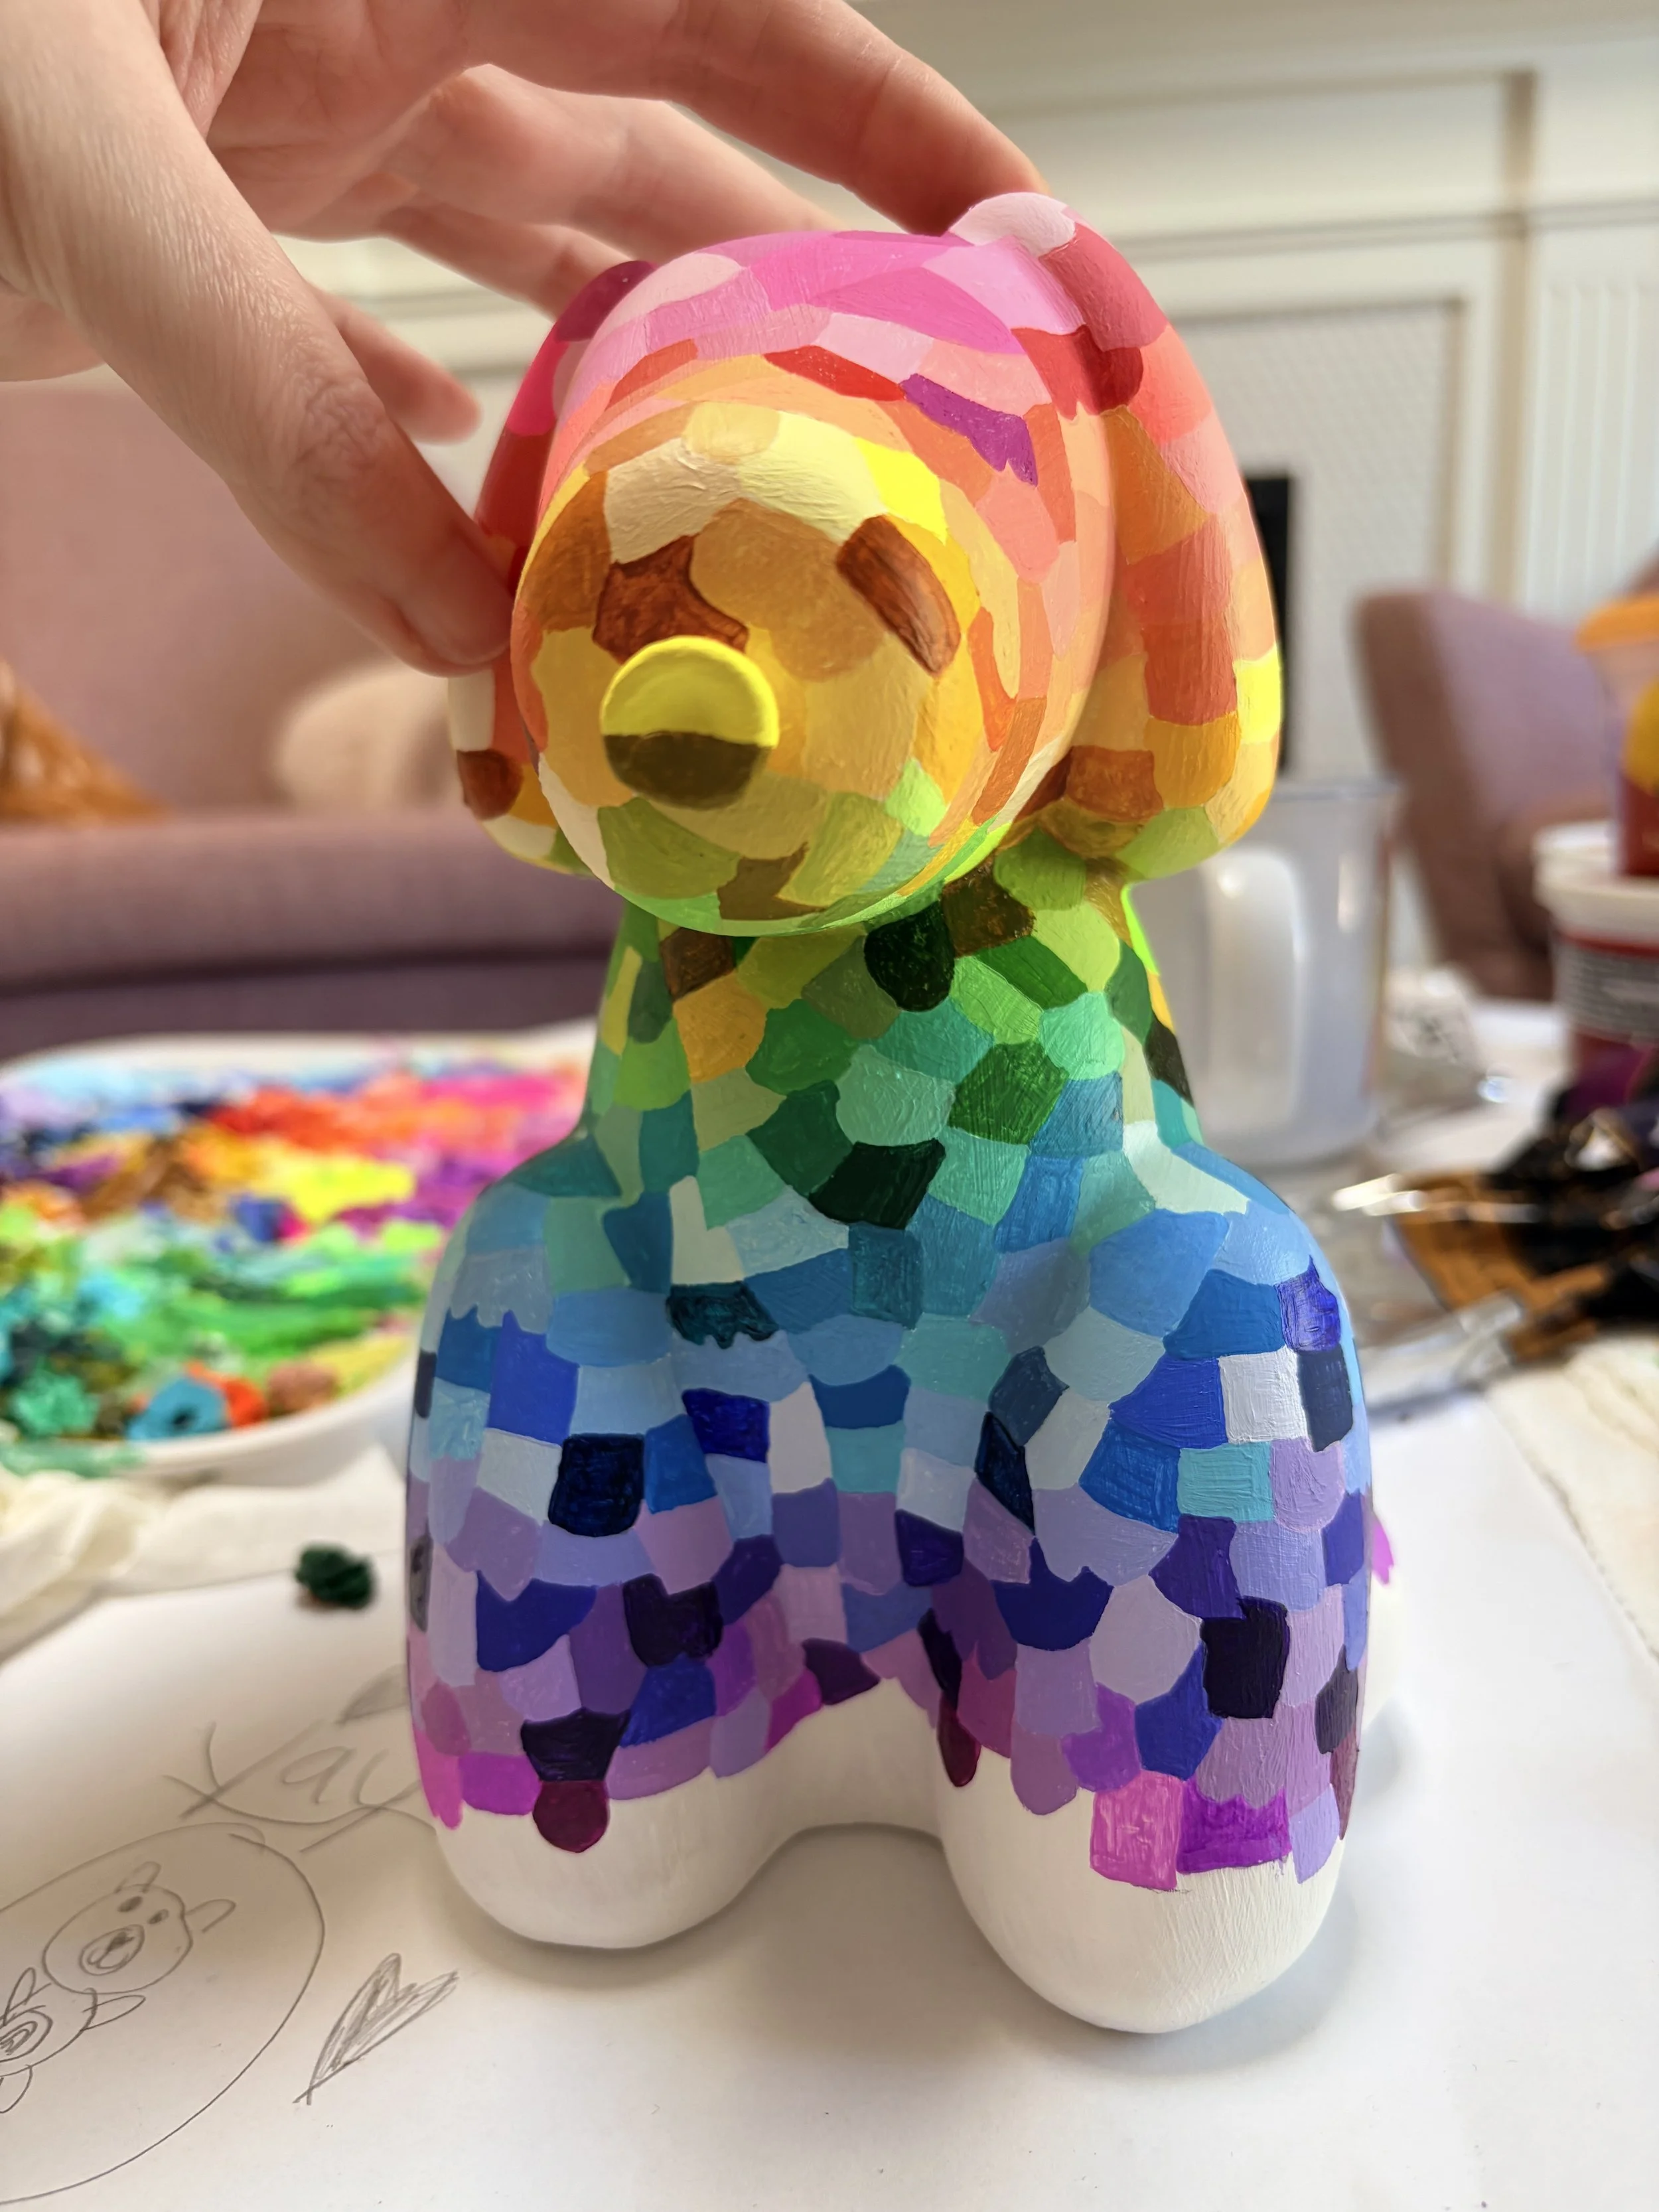
Green into blue took be a little bit more time. I played around with mixing a variety of tones, and also working with a variety of transparencies and textures to make each section more visually interesting and full of variety.
Then came starting into the purple section. I had planned for the lower sections to be larger, both in height and in depth with the shape of the dog being the same. I didn’t anticipate just how much time per colour that would add to the project. The purple section I really started feeling just how big of a difference in time and output for this section. It looked phenomenal of course, but all “planned” or “estimates” for time were out the window.
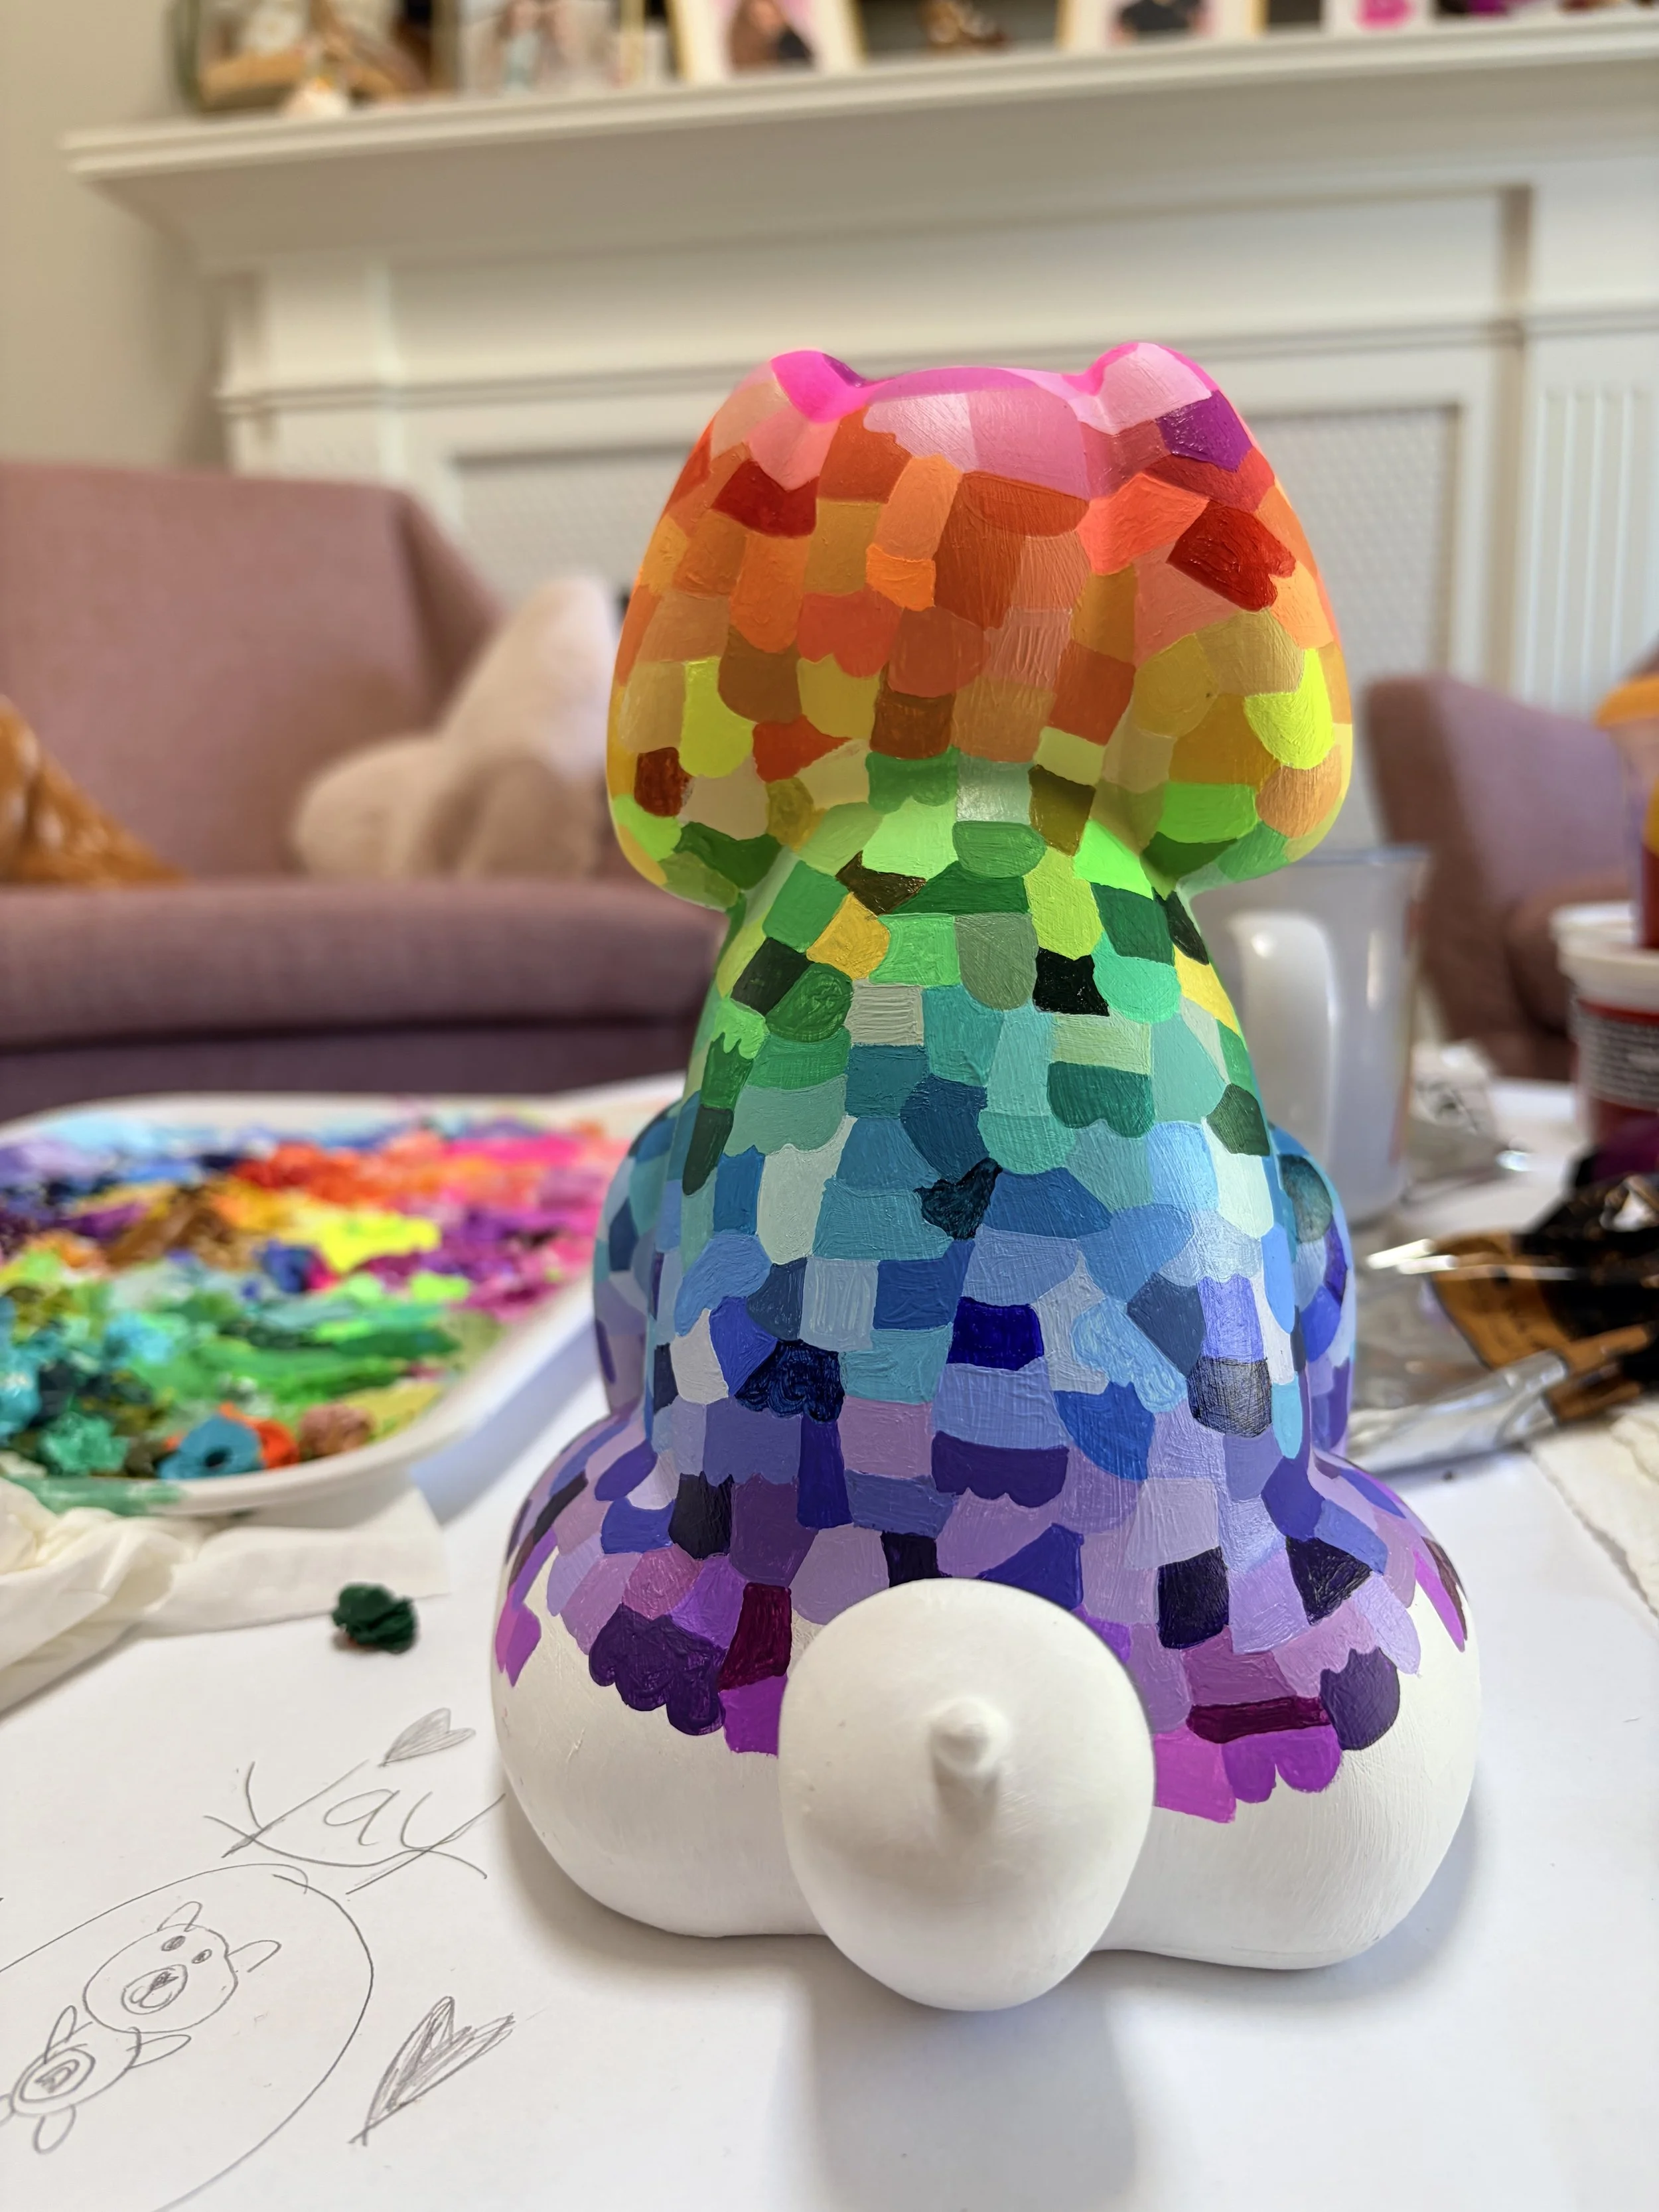
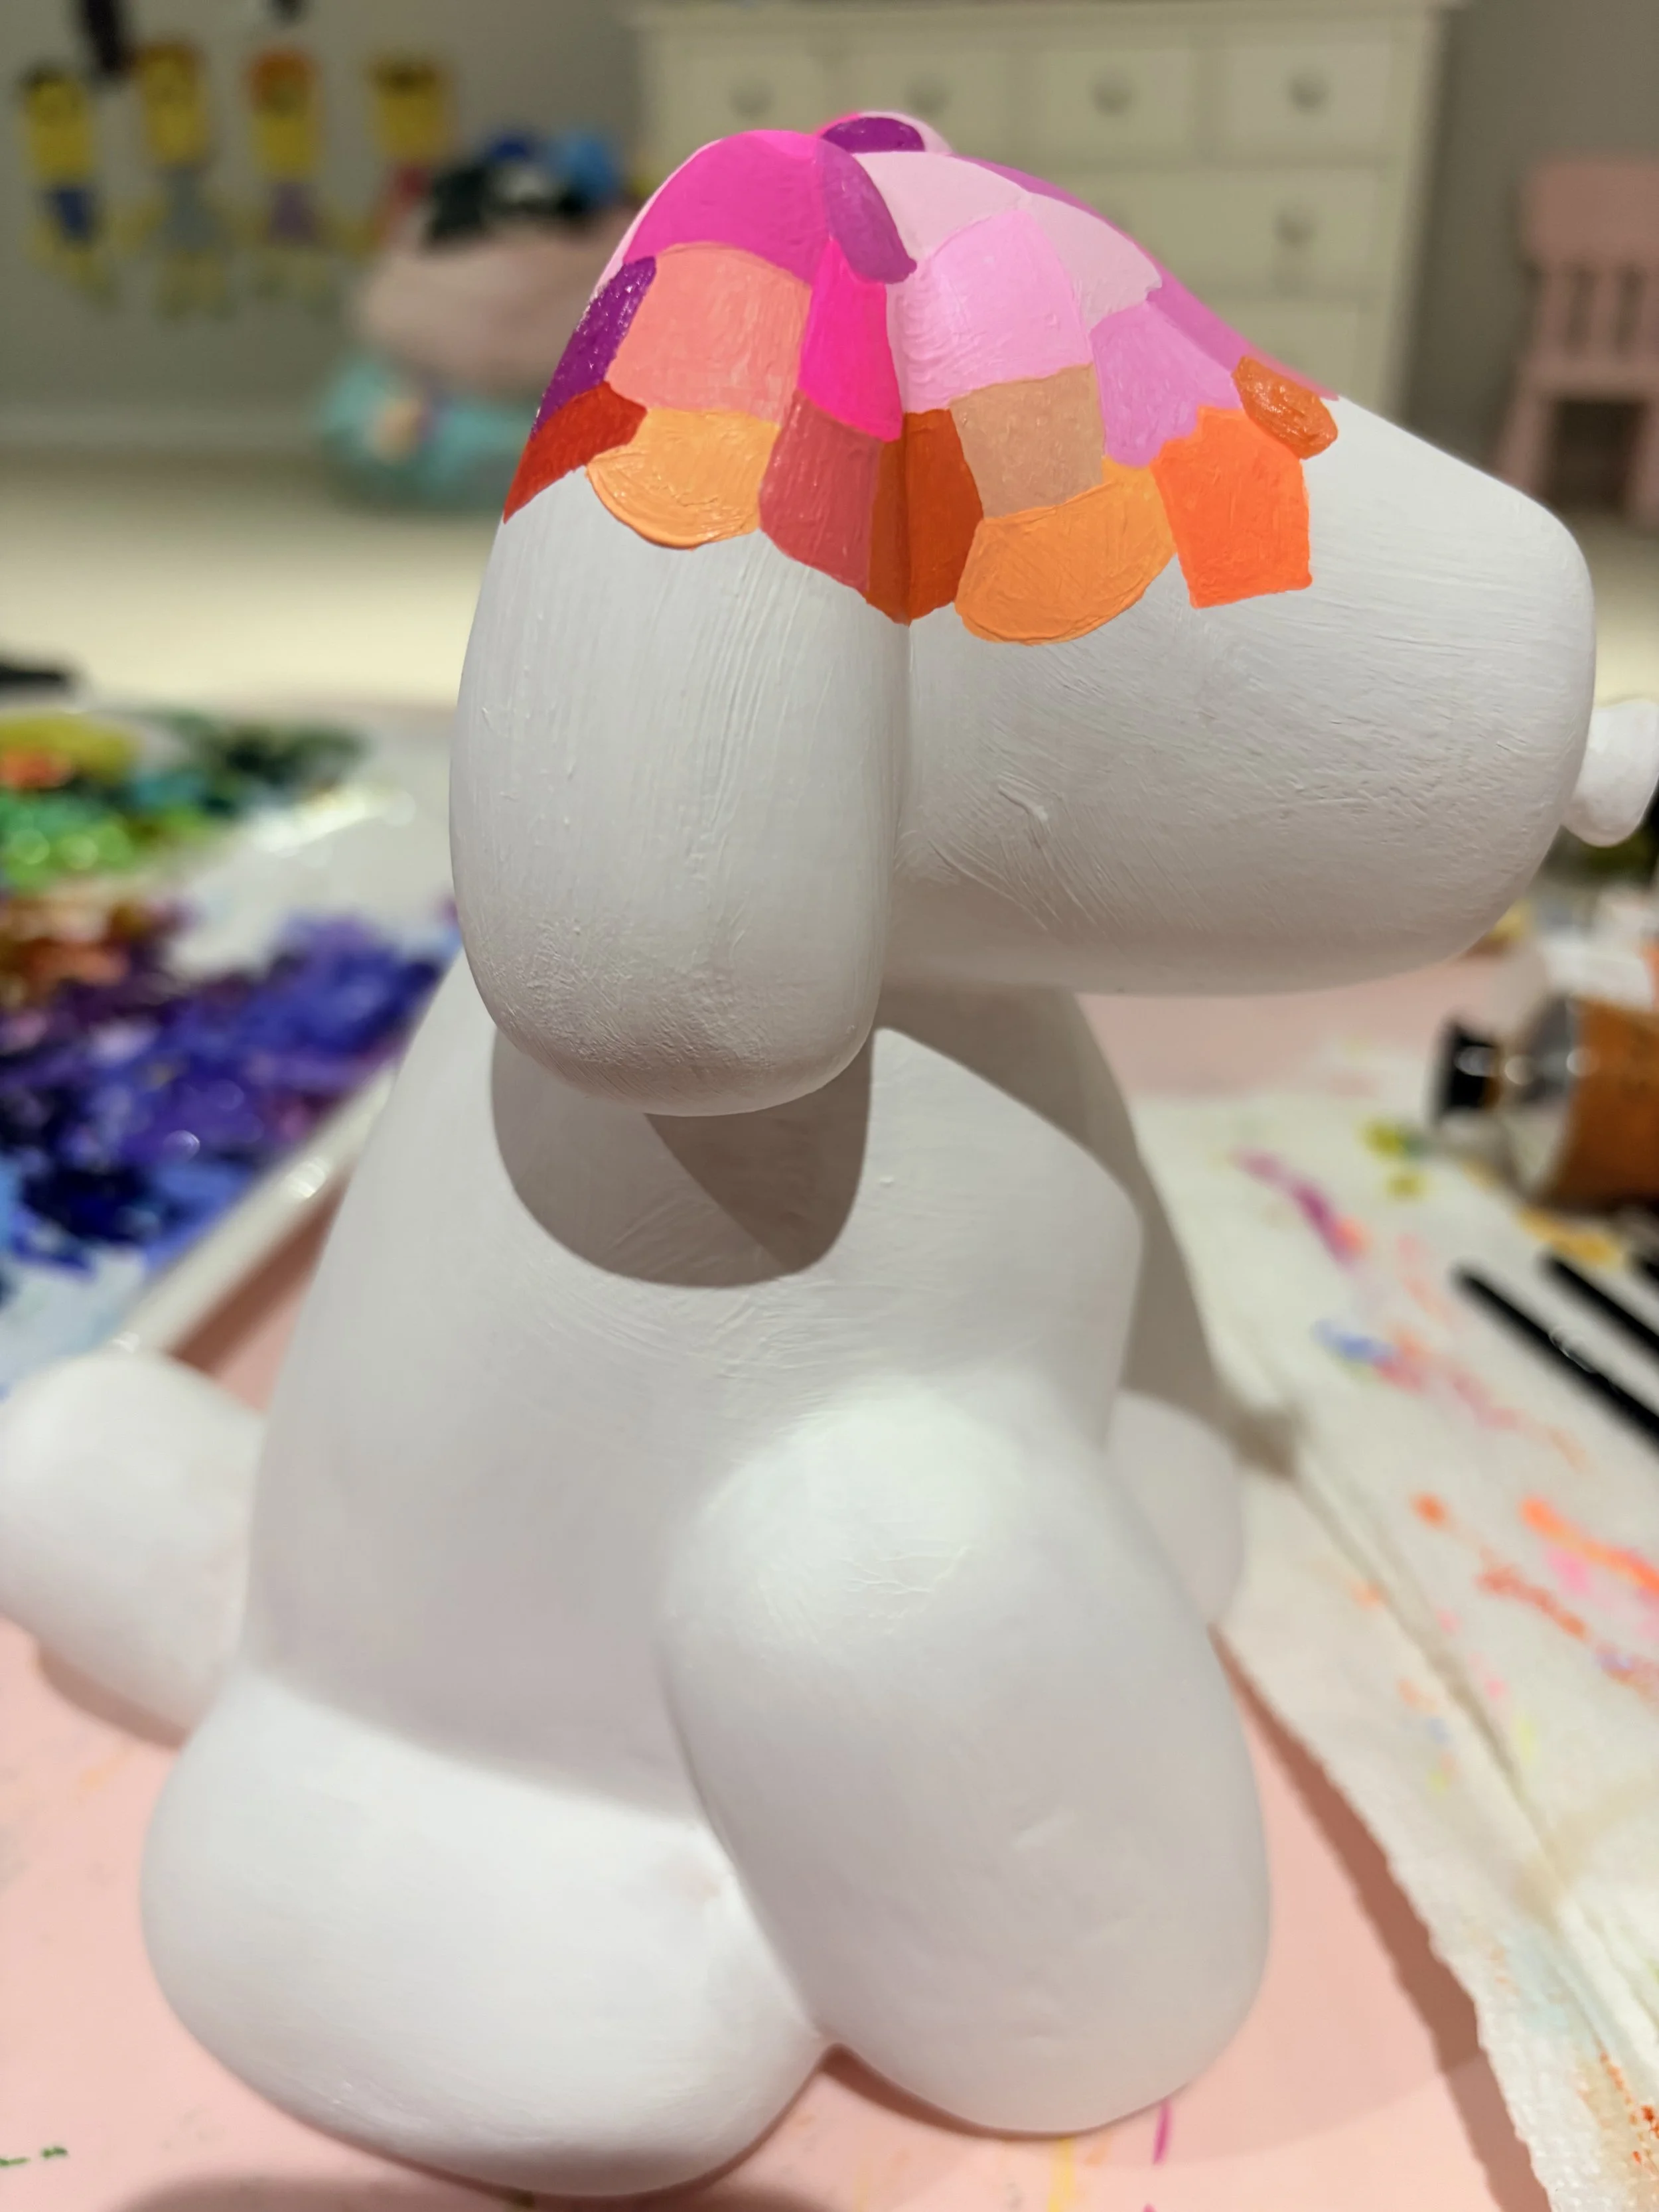
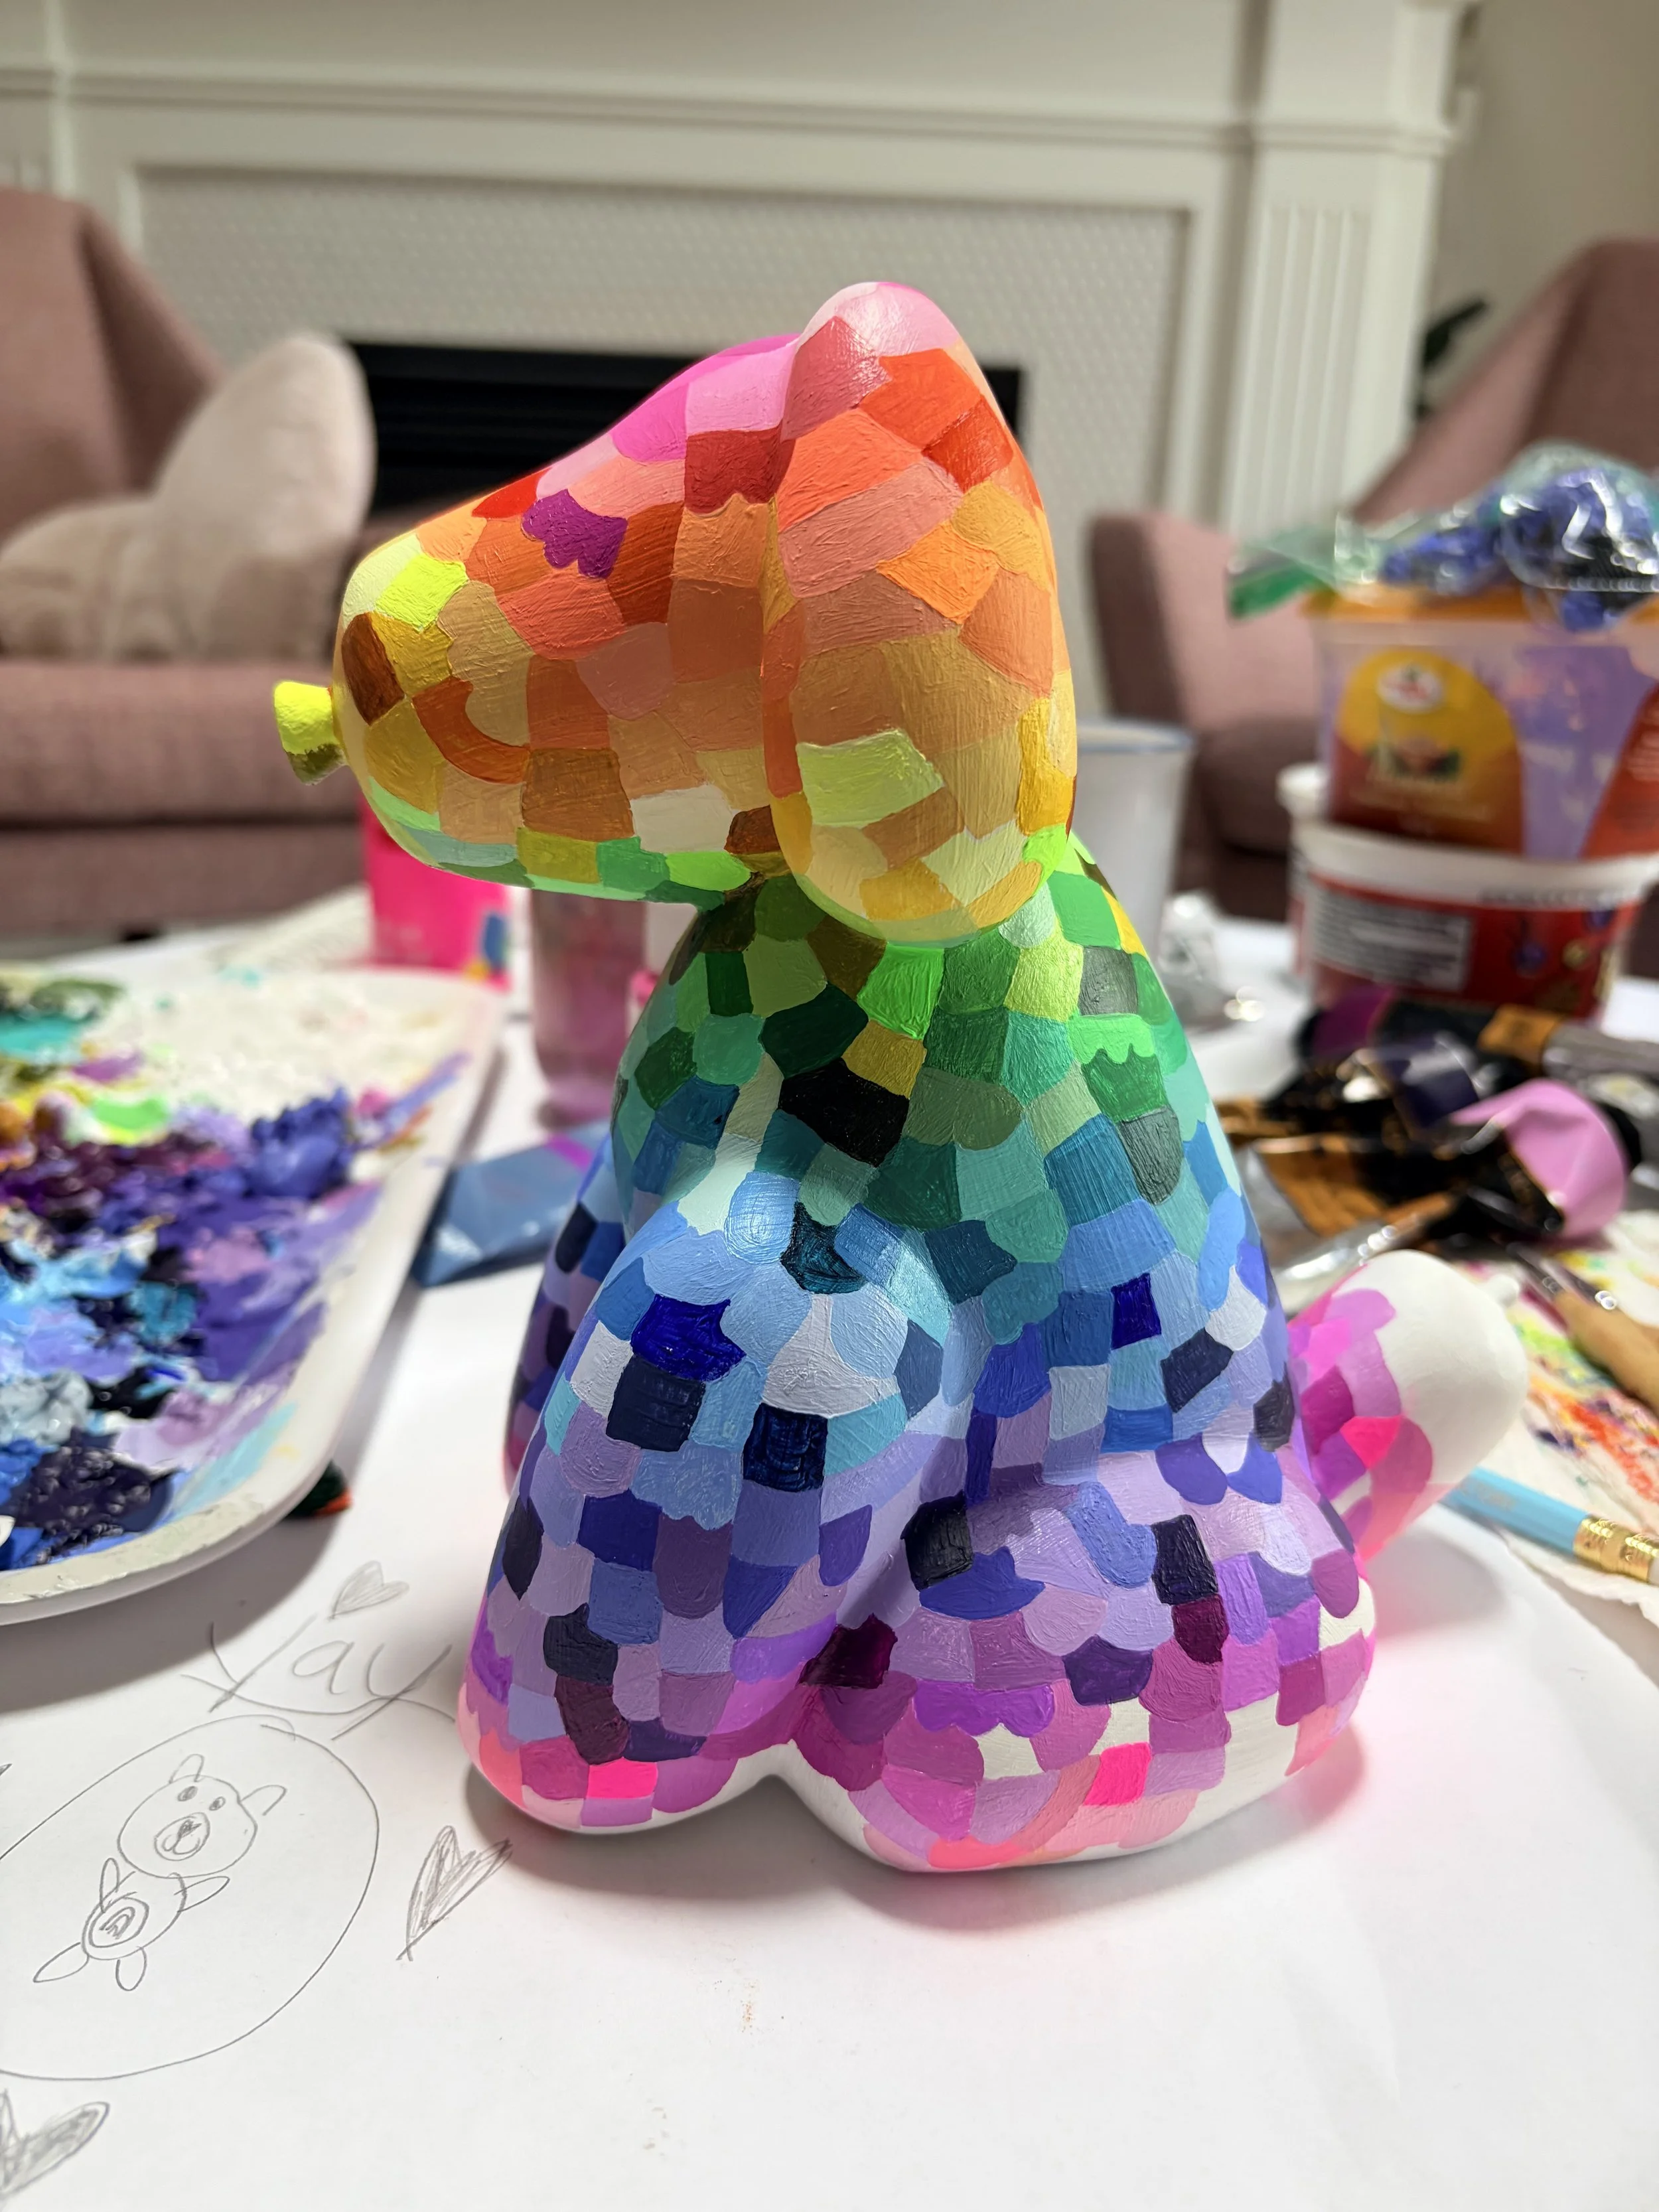
I got really excited transitioning from the purple into the magenta, and into the pink. It felt fitting ending the painting with pink again. Here I started mixing random colours and fitting them together on the dog like a puzzle. I bopped around mixing light tones, and then back to dark- whatever I felt like worked on the palette and so for a while it didn’t look like I was accomplishing very much.
When I got to the bottom of the pink, I continued with my plan to wrap the pink around the edge a uniform amount, and then paint the bottom a very dark purple for the most visual interest.

Above you can see several blank spots in the purple/pink that needed the perfect tone to be mixed to keep the variance executed smoothly.
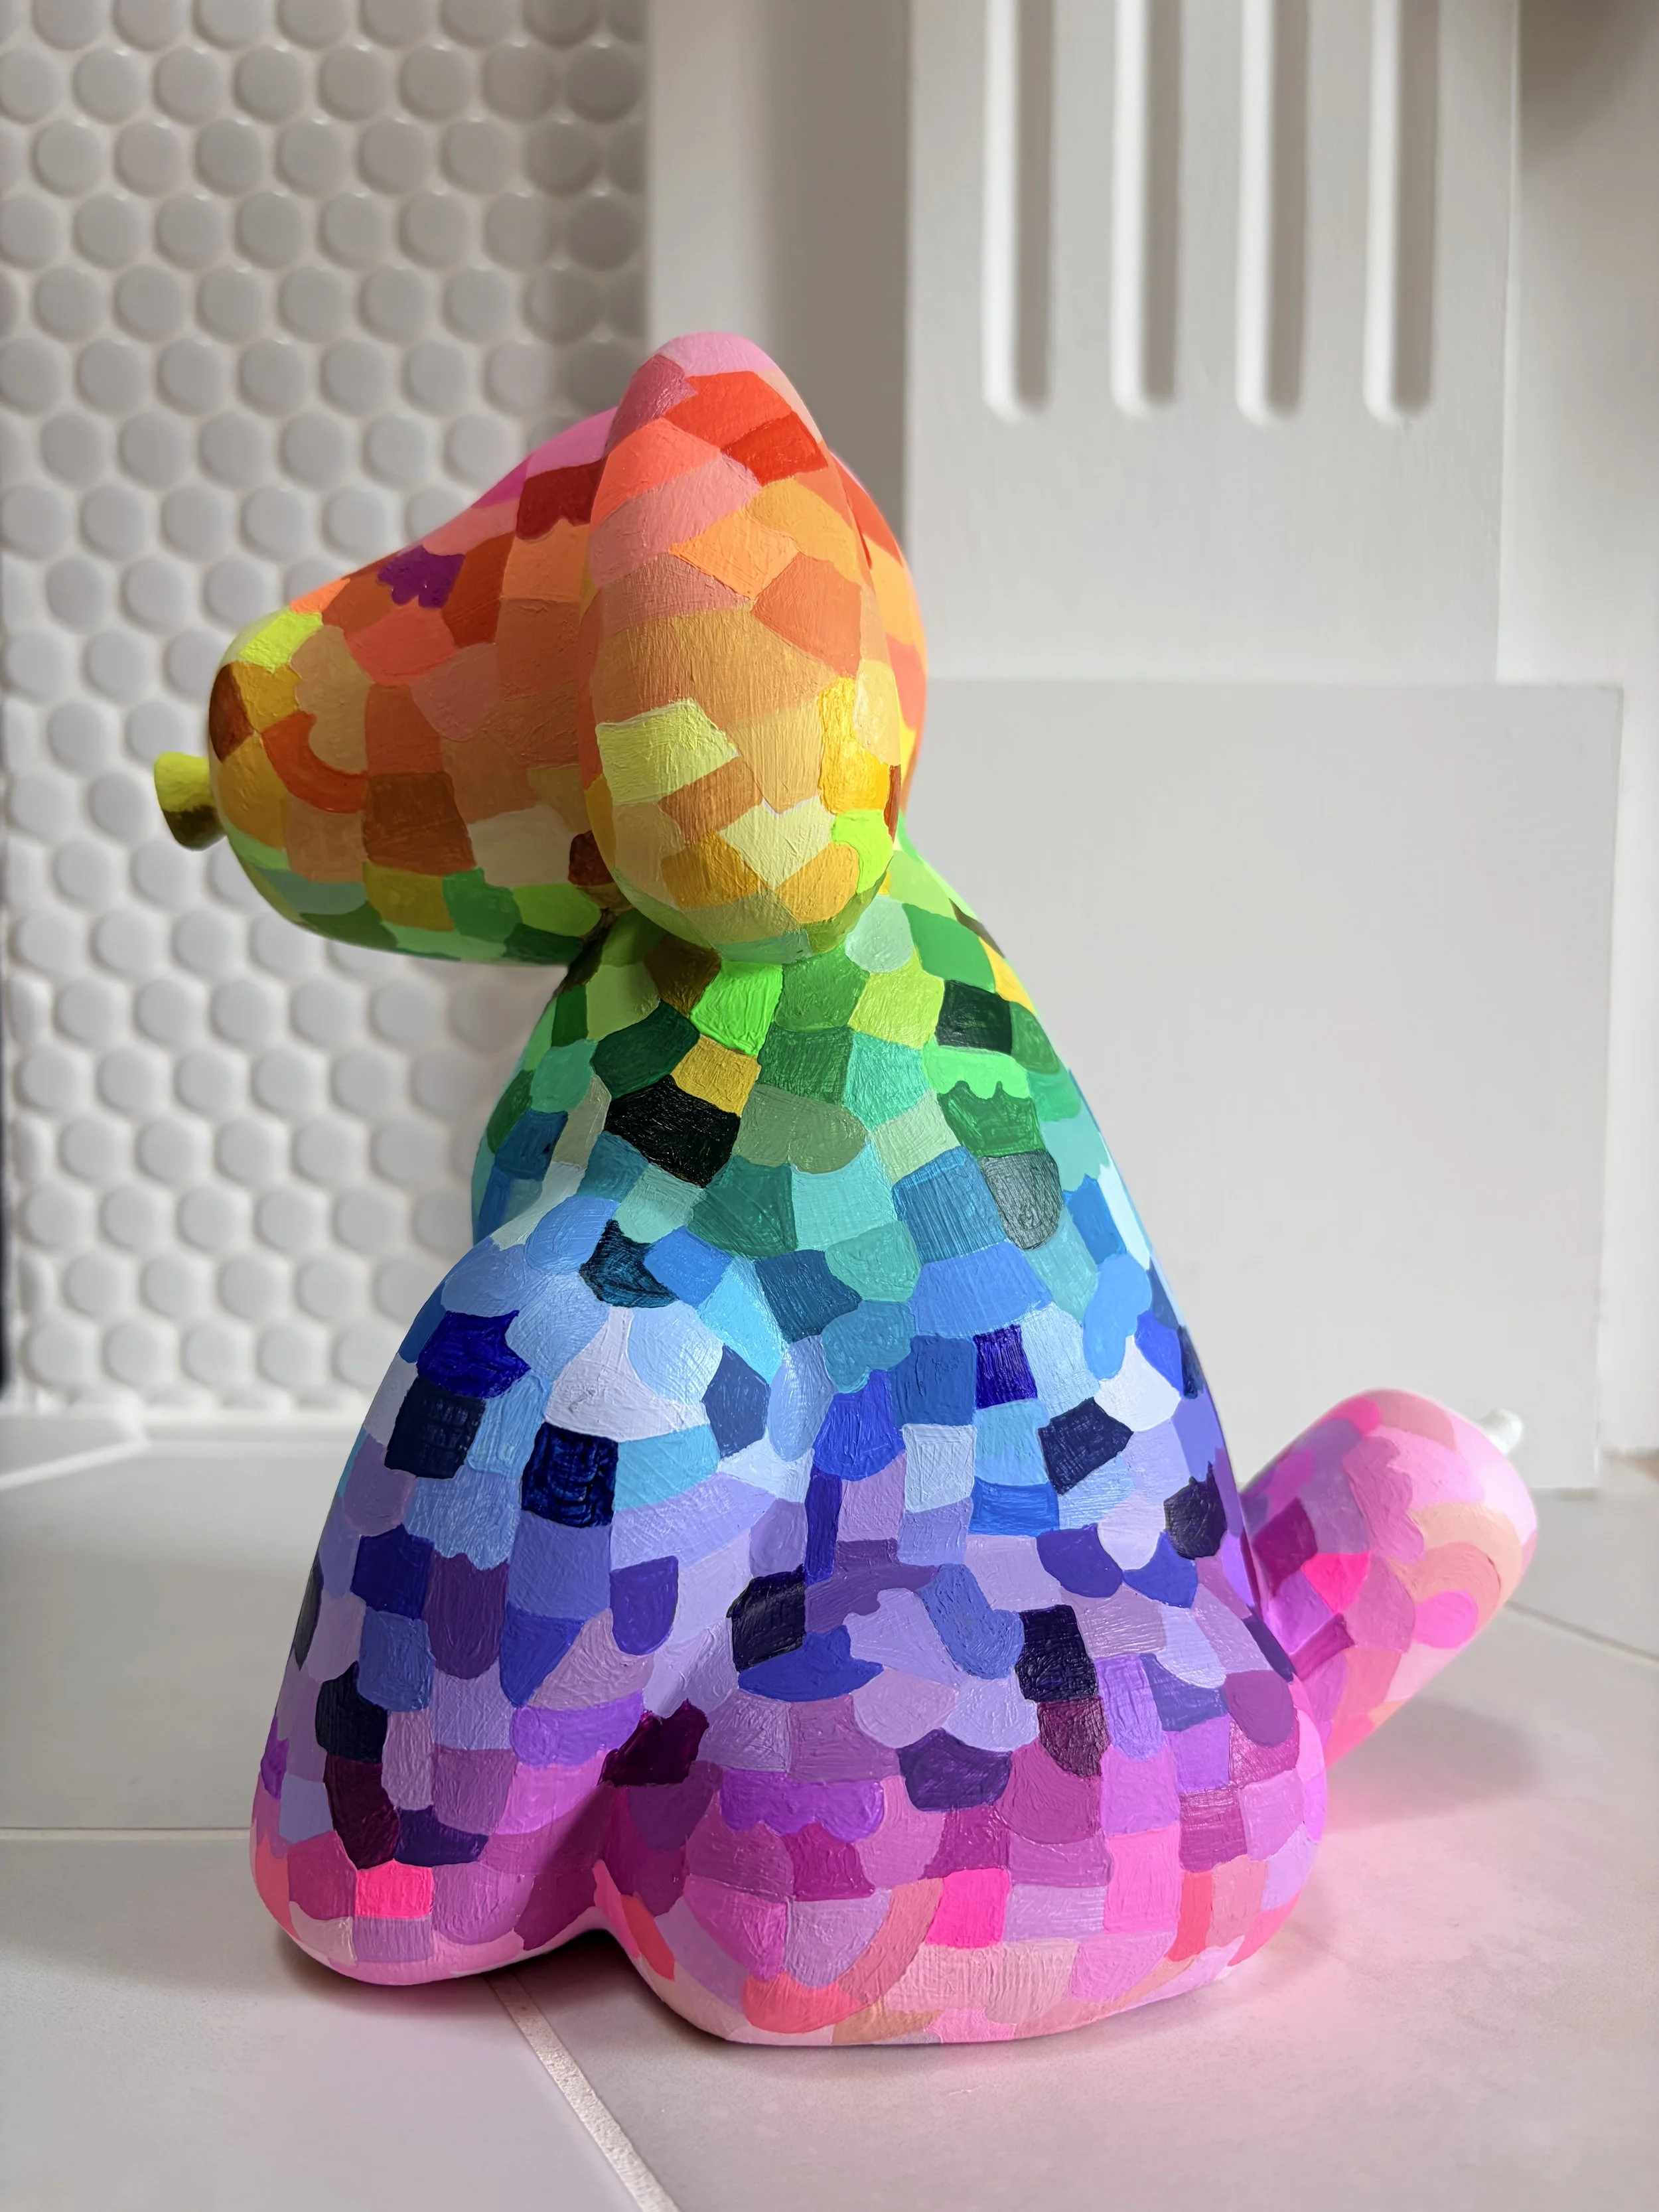
Finishing up the pink felt phenomenal. I mixed the pinks lighter and lighter until at the end of the tail we came to the natural conclusion of white/pink.
The tidy bottom. A dark purple mixed with black and layered on the bottom with a nice clean edge around the pink I had painted to wrap around. I forgot to take a photo of the bottom until after it had already been glossed.
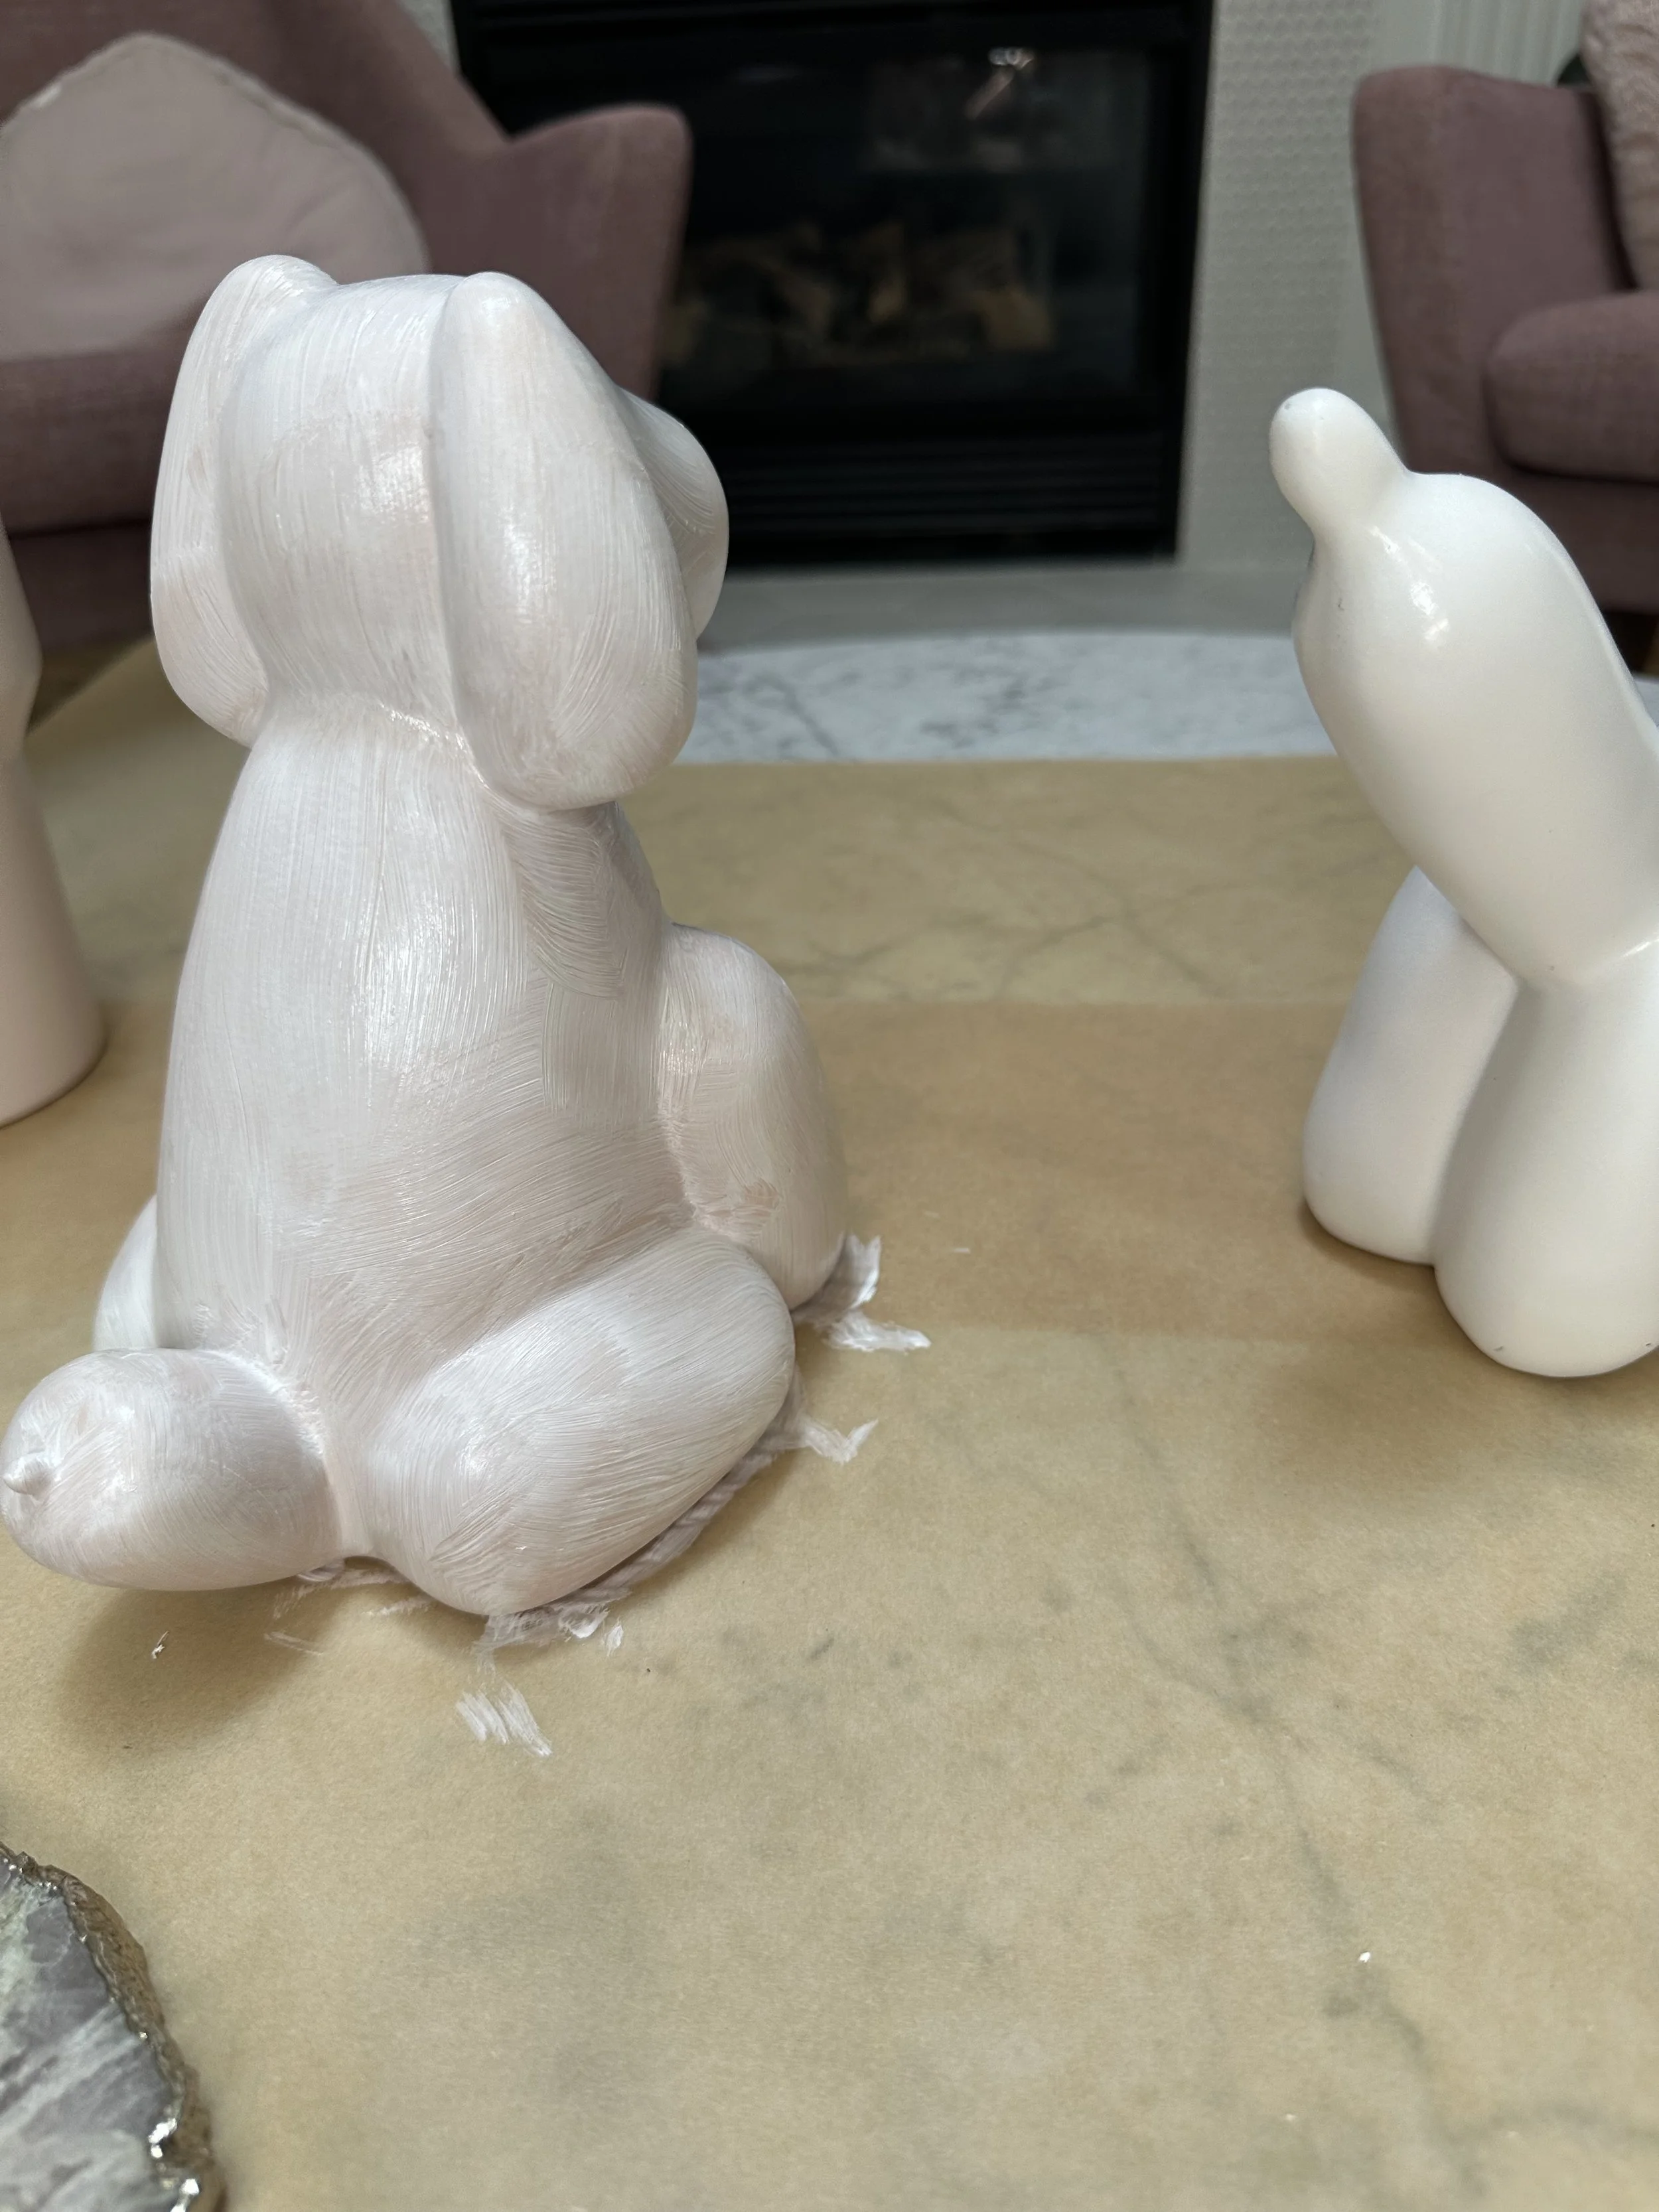
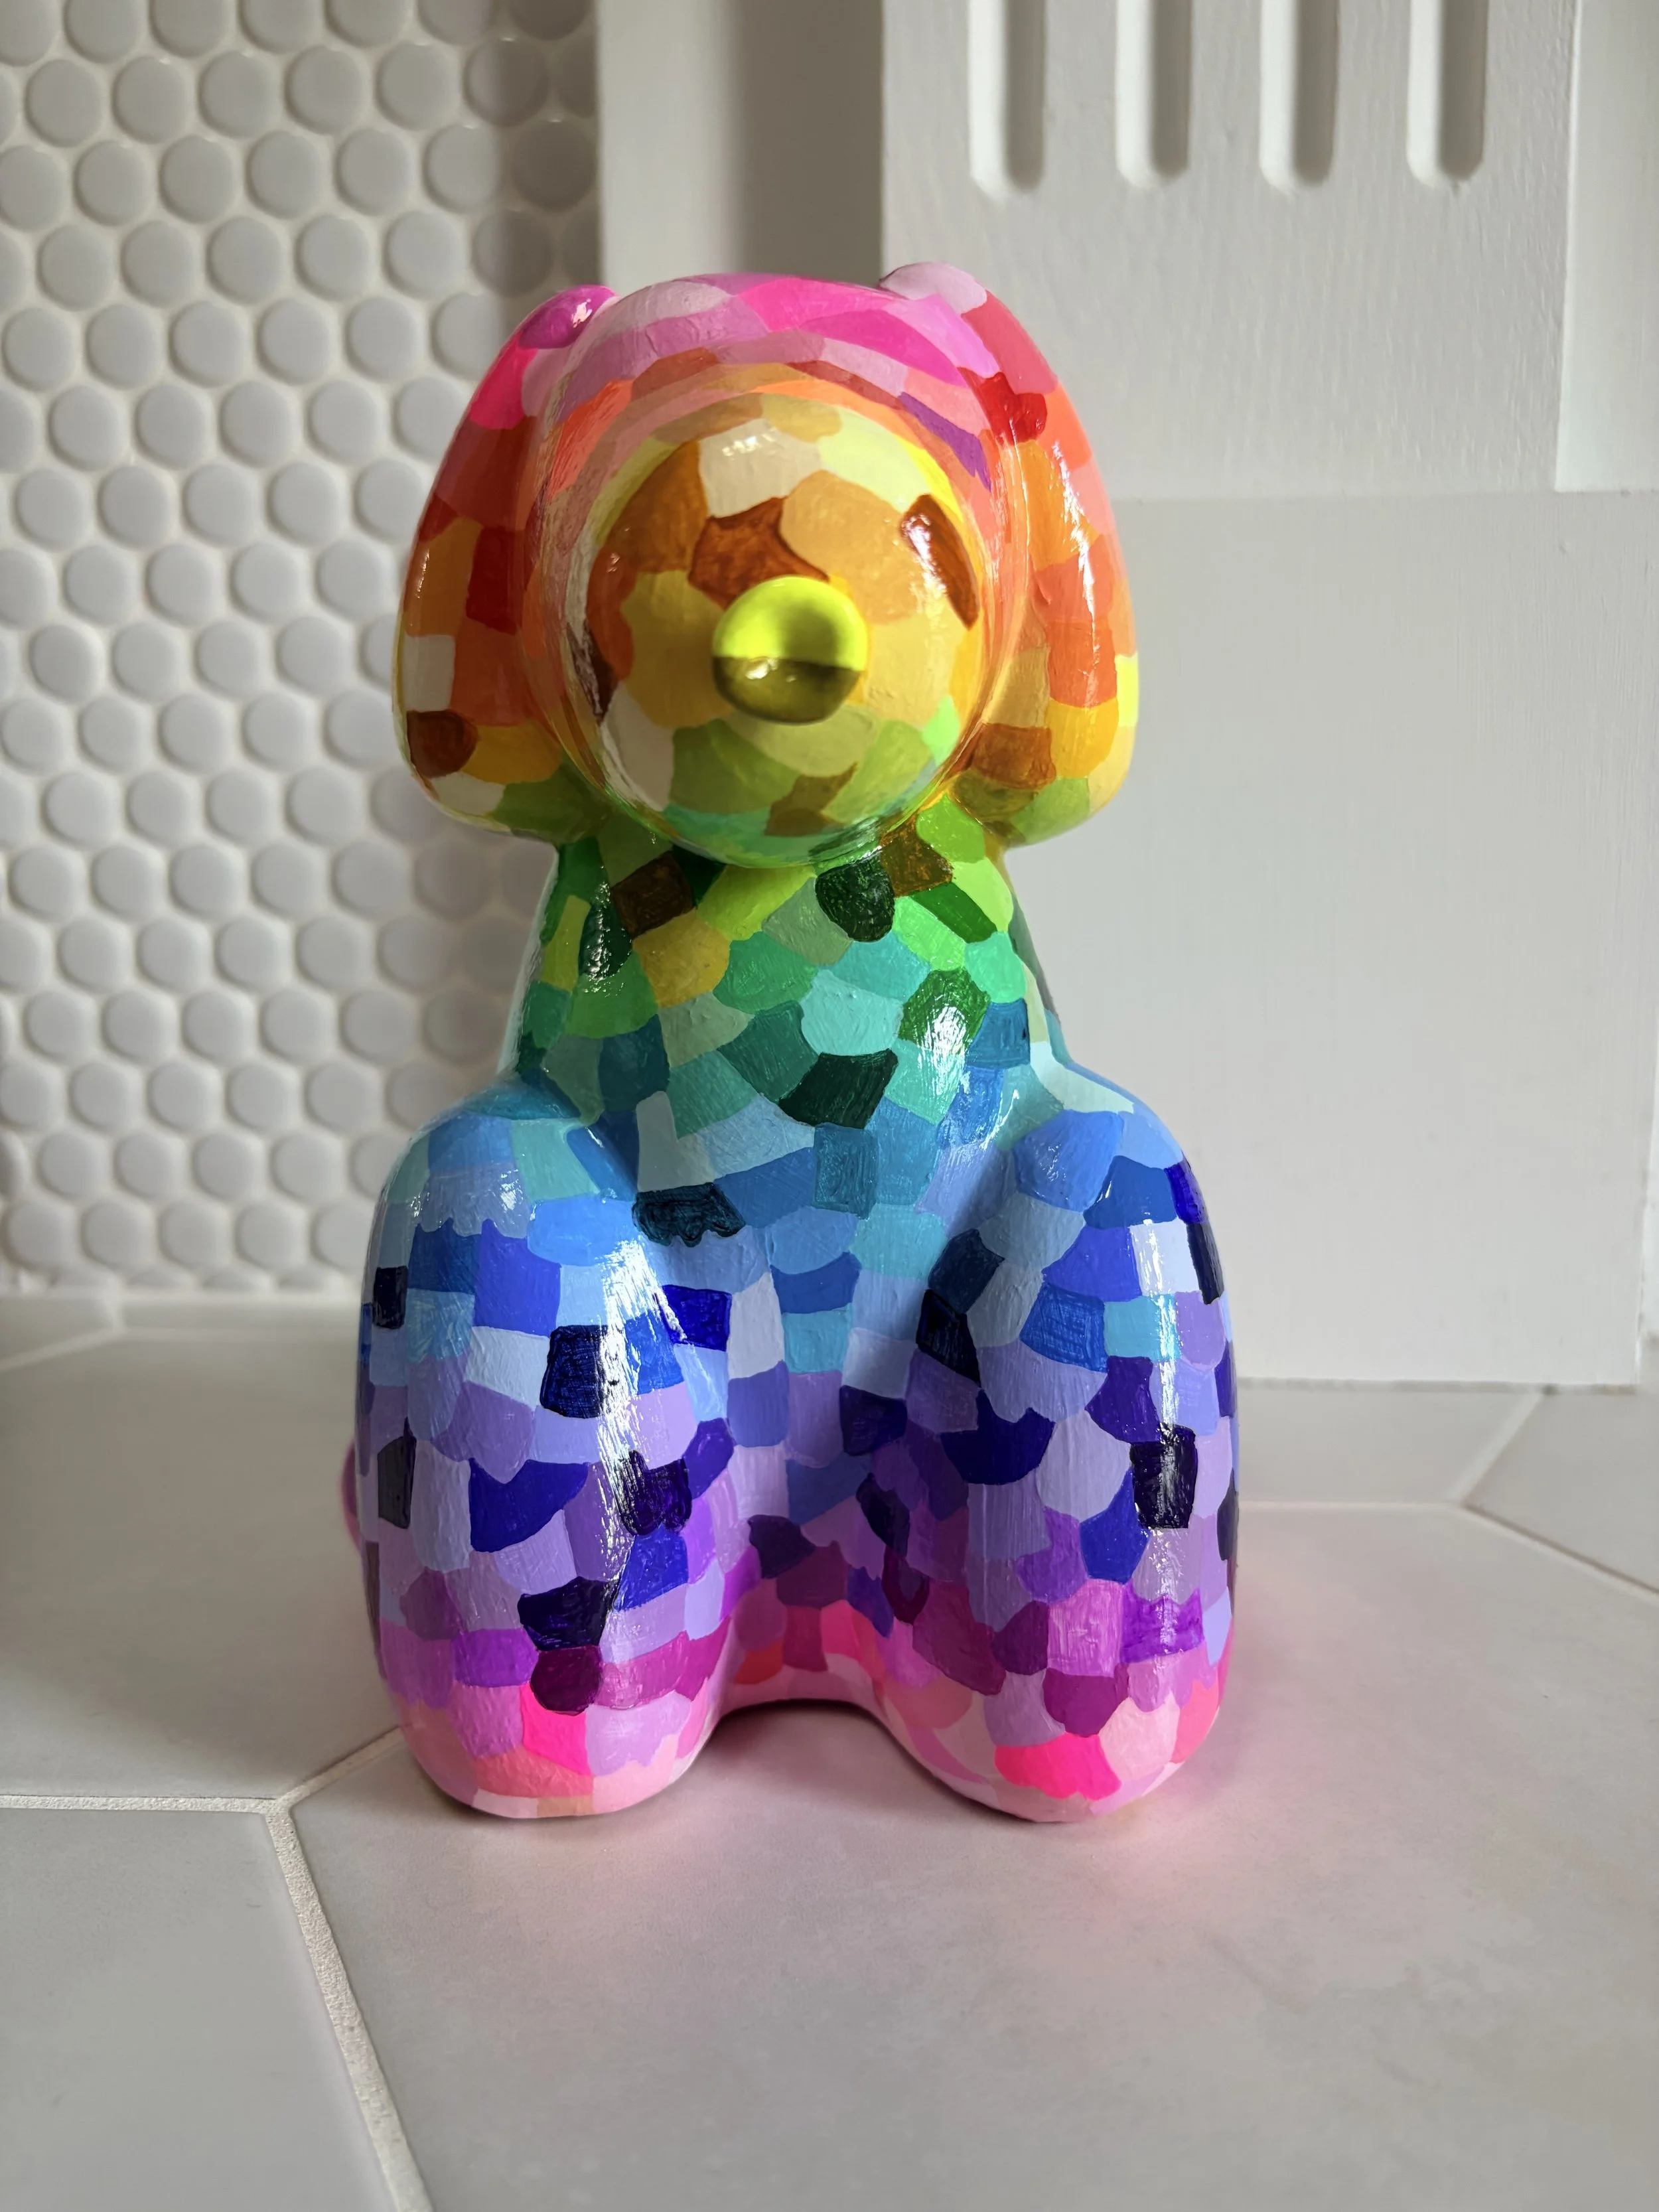
I went over the dog with 5 coats of High Gloss Varnish, waiting extra time in between layers to let it set properly. When the dog sides were dried after the 5th coat, I painted my signature on the bottom of the piece. When the signature was dry, I lay the dog on its side and did the same process with the varrnish on the bottom.

Overall, a fairly easy process in terms of technique. I used all supplies that I already had on hand. I would say that small, pointed detail paint brushes were the real star of the show in the creation of this guys new look. Other than that, it required patience, and a steady run of Youtube true crime shows to keep my mind occupied while I painted.
I don’t have my idea yet for my Balloon Unicorn, through I am more than excited to transform him as well. I will have to ruminate over idea’s for the next little while- maybe do some works on paper to stir up some new creative ideas.
As always, Thank you for reading, and supporting my work. Your visits to my websites, subscribing to my emails, and likes and shares on Social Media really do help to get my work seen. Keep that in mind for any artist you wish to support.
If you are interested in purchasing this Collectors Dog you can do so here
If you are interested in seeing the other items I have created in my Painted on series you can read about them here